Installing a new exterior light is a great weekend project. A new fixture can change the look and feel of your home's outside. Here in coastal areas like Monterey and Santa Cruz, the right light can match our unique home styles.
This simple update makes a big impact. It improves curb appeal, adds security, and makes your porch or patio feel welcoming.
This guide will walk you through the whole process. We’ll cover picking the right fixture, getting your tools, and doing the final safety checks. Our goal is to give you the confidence to do this yourself and get a great result.
What to Expect
We have laid this out in simple steps. You can see the whole picture before you start.
Here’s a quick look at what we’ll cover:
- Planning: How to choose the perfect light and location for your home.
- Tools: A simple checklist of everything you'll need.
- Wiring: A clear, safe guide to making electrical connections.
- Mounting: How to make sure your new fixture is secure and safe from weather.
- Final Check: How to test your work and fix common problems.
Good lighting is about more than just seeing in the dark. It is a key part of home security and smart design. Studies show that well-lit exteriors discourage intruders and can even increase a home's value.
Safety Always Comes First
Working with electricity requires your full attention. It might seem like a simple job, but you can’t cut corners on safety.
Throughout this guide, we will stress important steps. These include turning off the power at the circuit breaker and using a voltage tester to be sure. It's normal to feel a little nervous about electrical work, but we'll give you a safe process to follow.
How to Plan Your Outdoor Lighting Project
Before you grab a ladder, let's talk about planning. Taking time to plan will save you headaches and lead to a much better result. This is where you decide what light goes where, and why.
First, think about your goal. Do you want more security around the garage? A warm glow by the front door? Or a relaxing mood on the back patio? Your goal will help you choose the right fixtures and placement.
Choosing the Perfect Spot
Where you hang a light is as important as the light itself. A good location can turn a simple light into a beautiful feature. A poorly placed light can create glare or leave areas too dark.
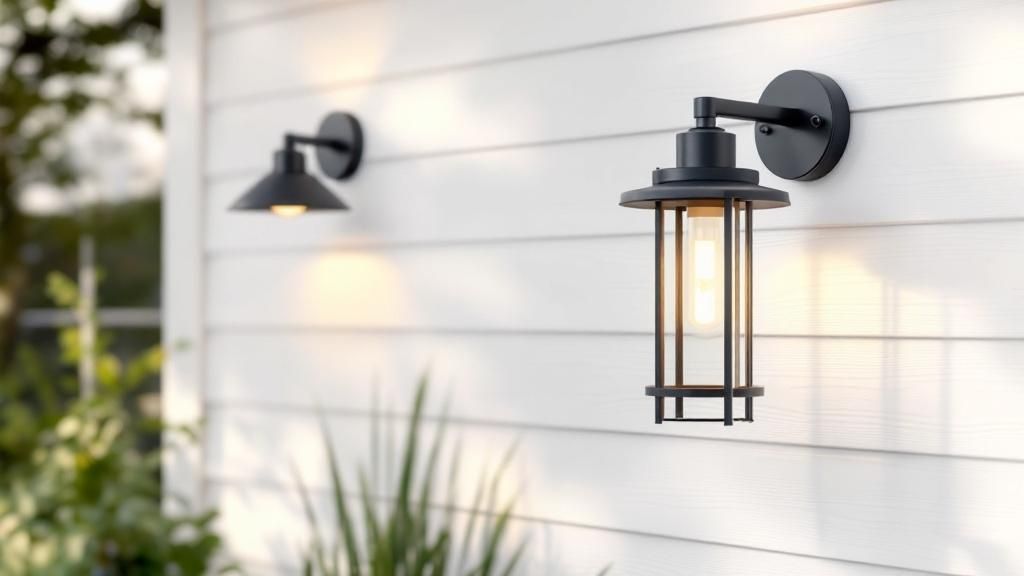
For front doors, you want balanced light. A good trick is to place sconces on both sides of the door. This creates a welcoming glow without blinding guests. Mount them a bit above eye level, usually around 66 inches from the floor.
If you want to highlight a feature like a stone wall, think about how light will "graze" the surface. This technique adds great texture and depth.
Matching Fixtures to Your Goals
The world of exterior lighting has a tool for every job. Knowing the main types will help you find the perfect fit.
- Wall Sconces: These are the most common outdoor lights. They’re perfect for doorways, porches, and garage entrances. Sconces provide focused light and come in many styles.
- Floodlights: If you need to light up a big area like a driveway for security, use floodlights. Modern LED floodlights are powerful but use little energy. Many have motion sensors for extra security.
- Pendant Lights: If you have a covered porch with a high ceiling, a pendant light can be a great focal point. It shines light downward to brighten the space below.
Understanding UL Ratings for Outdoor Use
Pay close attention to this part. Every outdoor light fixture has a UL (Underwriters Laboratories) rating. This rating tells you where it can be safely installed. Ignoring this is a serious safety risk, especially in our coastal Monterey climate.
Key Takeaway: A fixture's UL rating is a crucial safety standard, not a suggestion. Using an indoor light outside is a fire and electrical hazard.
Here’s a quick breakdown of the ratings:
- Damp-Rated: These fixtures can handle moisture but not direct rain. They are for covered areas like porches or patios.
- Wet-Rated: These are built to handle direct rain and weather. Wet-rated fixtures can be installed anywhere, like on uncovered walls or pergolas.
Considering Your Power Source
Finally, think about power. Are you replacing an old light or adding a new one? If you're swapping out an old light, the wiring is already there, which makes the job easier.
If you are installing a light in a new spot, the project is more complex. You’ll need to run a new electrical line. This is often a job for a licensed electrician to make sure it’s safe and meets building codes. If you want to upgrade, a homeowner's guide to smart home lighting installation can show you modern, convenient options.
Gathering Your Tools and Materials
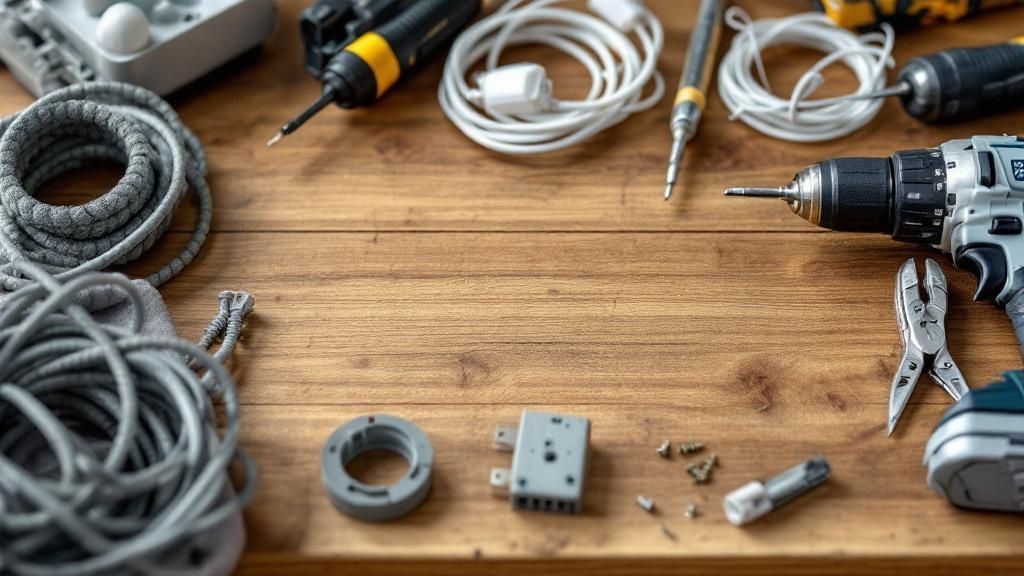
A smooth project starts with having every tool and material ready. Getting organized first prevents trips to the hardware store later. Most importantly, it helps you do the job safely and correctly.
Once you are comfortable with this project, these tools will be useful for other jobs. Learning to use them is a good skill for any homeowner, whether you're installing a light or learning how to put up gutters.
Your Checklist for Installing an Exterior Light
Lay everything out before you turn off the power. This simple step makes the project go smoothly. Here’s a list of what you'll need.
| Item | Category | Purpose |
|---|---|---|
| New Light Fixture | Materials | The star of the show! Make sure it's "wet-rated" for exposed areas or "damp-rated" for covered ones. |
| Non-Contact Voltage Tester | Core Tools | Your #1 safety tool. It confirms the power is off before you touch wires. You must have this. |
| Wire Strippers | Core Tools | Removes insulation cleanly without damaging the wire. This is needed for a secure connection. |
| Screwdrivers | Core Tools | A multi-bit driver is perfect for removing old fixtures and installing new ones. |
| Pliers | Core Tools | Helps twist wires together and shape them. |
| Wire Connectors (Wire Nuts) | Materials | These small caps securely connect your home's wiring to the fixture's wires. |
| Exterior-Grade Silicone Caulk | Materials | Creates a waterproof seal around the fixture base to protect it from moisture. |
| Sturdy Ladder | Helpful Extras | Lets you reach the fixture safely. Always place it on solid, level ground. |
| Headlamp or Flashlight | Helpful Extras | Since the power will be off, this helps you see. |
| Level | Helpful Extras | A small level makes sure your new fixture isn't crooked. |
| Painter's Tape | Helpful Extras | Can hold a fixture in place while you connect wires. |
Having these items ready will help you focus on doing the job right.
The Non-Negotiable Toolkit
For any electrical job, a few tools are essential for safety. Do not start without them.
First is a non-contact voltage tester. This is your most important safety tool. It confirms that the power is off before you touch any wiring.
You will also need good wire strippers. They remove plastic insulation from wires cleanly. You also need screwdrivers and pliers to twist and bend wires.
Materials That Make the Difference
Besides tools, you need the right materials to connect and protect your new fixture.
Of course, you have your new light fixture. Make sure it has the right UL rating. Here in the Monterey Bay area, it must be "damp-rated" for covered porches or "wet-rated" for spots exposed to rain.
You'll also need wire connectors, also called wire nuts. These plastic caps securely join the wires from your fixture to the wires in the wall.
A key but often forgotten material is exterior-grade silicone caulk. You will use this to create a waterproof seal around the base of your fixture. It protects the electrical box from moisture, which is very important for any coastal home.
Extras That Make the Job Easier
While the items above are must-haves, a few other things can make the process smoother.
A sturdy ladder is important. Make sure it’s on level ground and never overreach. A headlamp or flashlight is also a game-changer since the power will be off.
Finally, a small level will help you avoid a crooked fixture. A little painter's tape can also be useful to hold the fixture in place. These small touches help make the job easier.
A Practical Guide to Safe Electrical Wiring
Now, let's get to the hands-on part: the wiring. This step can seem scary, but it’s manageable if you are careful and safe.
The number one rule is simple: never work on live wires. Before you touch the fixture, go to your circuit breaker and shut off the power. Then, use a non-contact voltage tester to double-check. You must be 100% certain the power is off.
Removing the Old Fixture Safely
With the power off, you can remove the old light. This is usually easy. Just a few screws hold the fixture to its mounting plate.
Be ready to support the old fixture's weight. Once it’s free, you'll see the electrical box and three wires. Carefully unscrew the wire connectors to disconnect the fixture, and then set it aside.
Understanding the Wires
Inside the electrical box, you will find three wires. Each has an important job. Connecting them correctly is required for your new light to work safely. If you are new to this, a basic electrical wiring guide can help you build confidence.
Here’s a quick guide to what the colors mean:
- The Black Wire (Hot): This brings power from your breaker panel to the light.
- The White Wire (Neutral): This wire completes the circuit, carrying power back to the source.
- The Copper or Green Wire (Ground): This is a safety wire. If there's a problem, it gives electricity a safe path to the ground to prevent shock.
Your new light fixture will have matching wires. The goal is to pair them up: black to black, white to white, and ground to ground. This color-coding system makes the process easier.
Pro Tip: For a strong connection, use pliers to gently twist the bare copper ends of matching wires together before you screw on the wire connector. This ensures the wires make good contact and won't come loose.
This visual guide shows the core safety and connection steps.
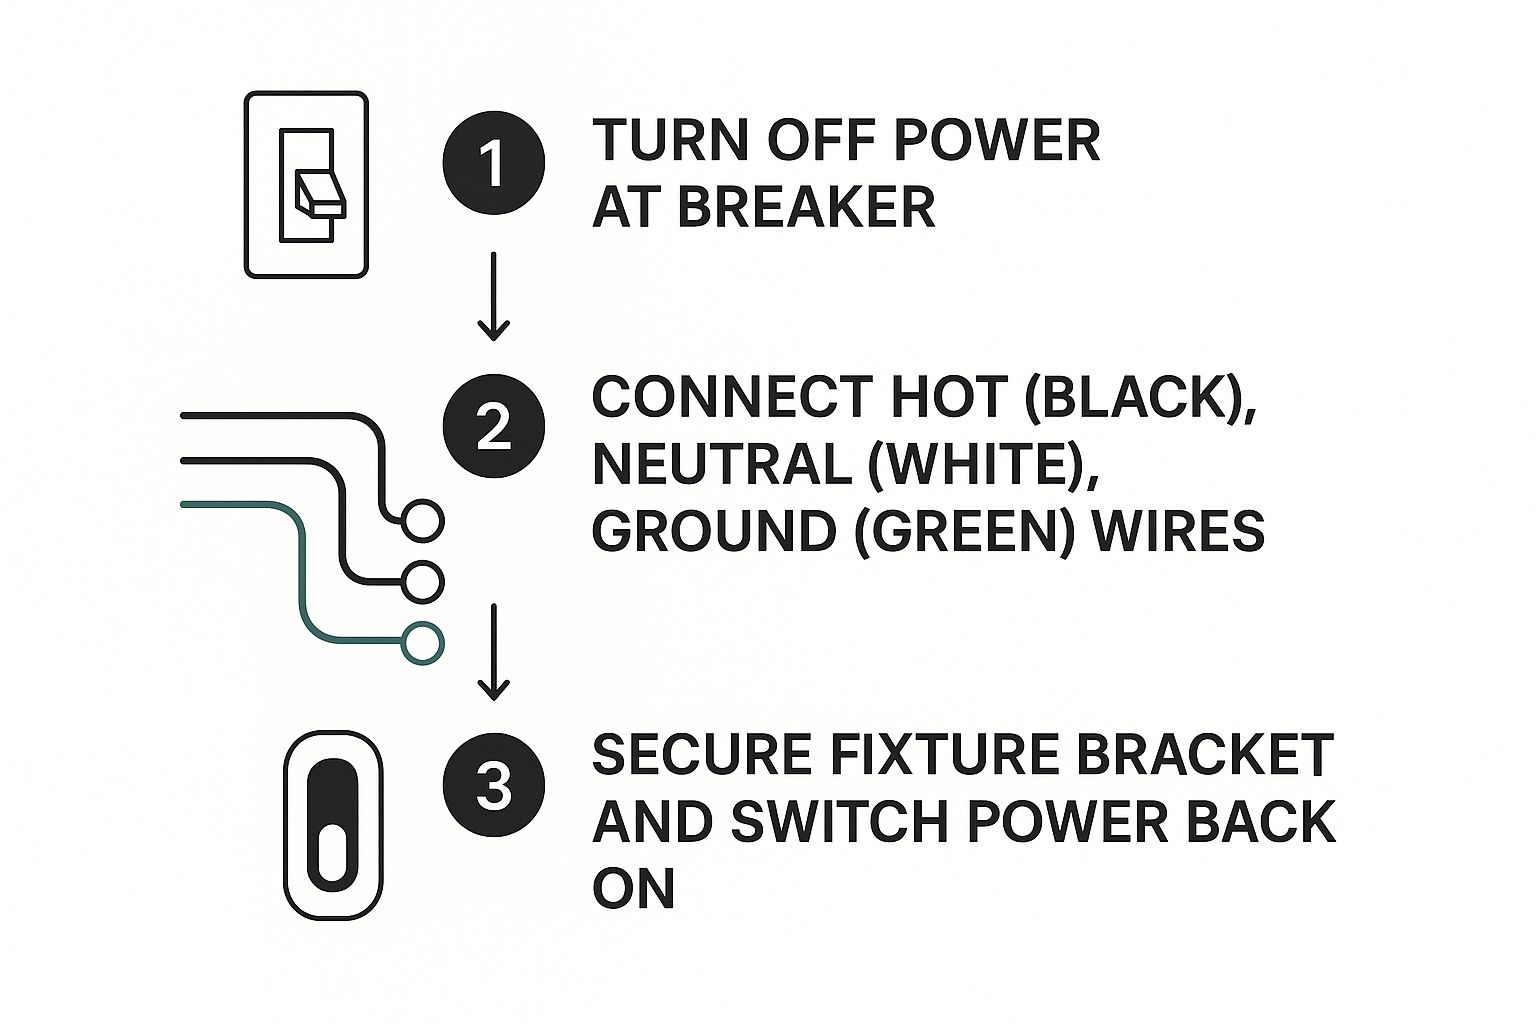
Power off, connect correctly, and secure everything. This is the foundation of a safe installation.
Making the Right Connections
Now it's time to connect your new fixture. Always start with the ground wires first. Connect the fixture's ground wire to the one in the electrical box. Next, connect the two white (neutral) wires, and then connect the two black (hot) wires.
To make each connection, twist a wire connector over the ends and turn it clockwise until it feels snug. You can give each wire a gentle tug to be sure it's secure. For more help, see our guide on how to wire a light fixture.
Once all connections are solid, carefully tuck the wires back into the electrical box. Don't just stuff them in. You want them neatly contained with enough room for the mounting bracket.
How to Mount and Weatherproof Your New Fixture
With the wiring done, you're almost finished. Now you need to get the fixture on the wall and protect it from the weather. This part of the job makes sure your light will last for many years.
First, attach the mounting bracket to the electrical box. Make sure it’s snug and level. A crooked bracket will mean a crooked light.
Once the bracket is solid, you can hang the light. Secure it with the screws provided. Before you tighten everything, use your level to check that the fixture is perfectly straight.
The Critical Step of Weatherproofing
Now for the most important part of finishing up: weatherproofing. This step is your best defense against moisture. Here on the Central Coast, with our fog and damp air, this is absolutely essential.
A waterproof seal prevents rain and condensation from getting into the electrical box. This protects your home from short circuits and rust. Skipping this can cause the fixture to fail and create safety hazards.
To do this right, use a high-quality, exterior-grade silicone caulk. This caulk is designed to stay flexible and waterproof for years.
Applying the Perfect Bead of Caulk
Applying caulk is simple, but there's a specific way to do it. You will run a continuous line of caulk around the top and both sides of the fixture's base where it meets the wall. This acts like a little roof to guide rainwater away from the electrical box.
Here’s a key trick: leave the bottom edge of the fixture unsealed. This sounds strange, but it's very important. Leaving a small gap at the bottom creates a "weep hole." This allows any moisture that gets behind the fixture to escape. Sealing all the way around could trap moisture inside.
Why Durability Matters for Outdoor Fixtures
Choosing a durable, high-quality fixture is just as important as sealing it correctly. This is why LED lighting is so popular for outdoor use. Modern LEDs are tough and built for harsh conditions.
The U.S. Department of Energy reports that using LED bulbs can save households about $225 in energy costs per year. This shows how efficient and long-lasting modern lighting can be.
By pairing a well-built, wet-rated fixture with a proper weather seal, you're protecting your investment. This smart thinking is key to all good outdoor design, a topic we cover in our guide to inspiring landscape lighting design ideas. Taking these extra minutes now will give you years of peace of mind.
Final Steps and Troubleshooting Common Problems
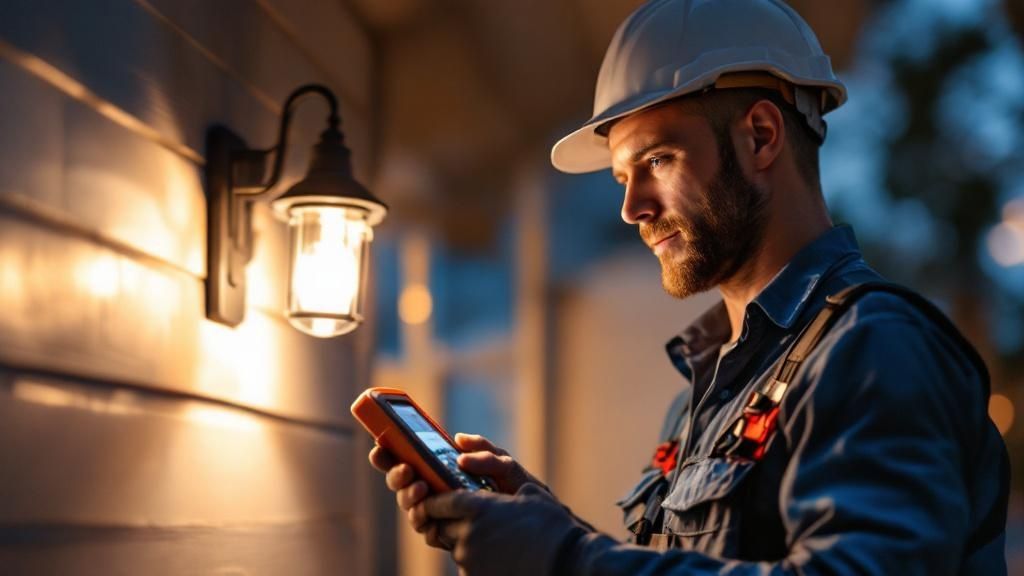
You’ve made it through the hard part. The fixture is mounted, wired, and sealed. Now it is time to test your work.
Go back to your circuit breaker panel. Flip the breaker you switched off back to the “ON” position. Now, walk back to the light and hit the switch. Seeing your new fixture turn on is a very satisfying moment.
When the Light Does Not Turn On
What if it doesn't turn on? Don't panic. The fix is usually simple. Before you think you messed up the wiring, run through this quick checklist.
Always start with the easiest things first:
- Check the Bulb: Is the lightbulb screwed in all the way? Make sure you are using a new, working bulb.
- Check the Breaker: Go look at the panel again. Sometimes a breaker can trip. Firmly switch it off and then on again.
- Check the Switch: It sounds silly, but make sure the light switch is flipped on.
If you checked those and still have no light, you may have a loose connection. Turn off the power at the breaker again. Carefully take the fixture down and gently tug each wire connection. If one comes loose, you've found the problem.
Addressing Flickering Lights
A flickering light is a sign of a bad connection. Usually, the cause is a wire nut that isn't screwed on tightly enough. Turn off the power at the breaker, then go back and make sure every wire connector is snug.
Sometimes, the flicker is caused by the bulb or a dimmer switch. Try a different bulb. If that doesn't fix it, the issue might be with the switch or wiring. At that point, it’s best to call a professional.
A good installation is a real asset to your home. That's why the global outdoor lighting market is projected to reach over $17 billion by 2027, according to a report by Mordor Intelligence. Homeowners know that great lighting boosts both security and curb appeal.
Troubleshooting is just a process of elimination. By working through these problems one by one, you can solve most issues yourself. For more ways to improve your home's safety, check out our guide on the best outdoor security lighting.
FAQs: Installing Exterior Light Fixtures
Here are answers to some common questions we hear from homeowners in the Monterey Peninsula about installing outdoor lights.
Do I need a special electrical box for an outdoor light?
Yes, absolutely. You must use a weatherproof electrical box for any outdoor fixture. These boxes are made for "wet" or "damp" locations. They have sealed seams and gaskets to keep moisture away from your wiring. This is a critical safety step.
What is the difference between "damp-rated" and "wet-rated" lights?
This is a great question, especially for homes here on the Central Coast.
- Damp-Rated lights are for covered spaces like a porch with a roof. They can handle moist air but not direct rain.
- Wet-Rated lights are for areas exposed to the elements. Use them on uncovered walls or anywhere rain can hit them directly. Choosing the right rating is key for safety and long life.
Can I mount a light fixture directly on vinyl siding?
It is best to avoid mounting a light directly on vinyl siding. The better, more professional way is to use a vinyl siding mounting block. This block creates a solid, flat base for the fixture. It prevents the siding from cracking and gives you a cleaner installation.
When should I call a professional electrician?
Your safety is always the top priority. It's time to call a licensed electrician if you need to run a new electrical line. Also, call a pro if you are not 100% sure about the wiring you see or if you feel uncomfortable at any point. A professional will make sure the job is done safely and correctly.
What is the best height to hang a porch light?
A good rule of thumb is to mount your porch light or wall sconces at about 66 to 72 inches above the floor. This places the light just above eye level. It provides good illumination without creating a harsh glare for you or your guests.
For more guidance on choosing the right fixtures, feel free to explore our full range of outdoor home lighting solutions.
Ready to brighten up your home's exterior? The expert team at The Home Lighter, Inc. is here to help you choose the perfect fixtures for your Monterey Peninsula home. Visit our Pacific Grove showroom or get in touch with us today.