Swapping out an old light fixture is a classic DIY project that delivers a huge impact for a small amount of effort. Mastering a few basics—turning off the power, matching the wires, and mounting the new fixture—is all it takes to transform a room.
This guide will give you the confidence to tackle this project, whether you're in a new build or an older Spanish-style home here on the Central Coast.
Your Essential DIY Light Fixture Wiring Guide
Learning how to wire a light fixture is a fantastic skill for any homeowner. It gives you the freedom to finally install that sleek pendant light you’ve had your eye on for the kitchen.
This guide walks you through the entire process, step-by-step. We'll provide the context and confidence you need, with a focus on safety first, followed by making solid, correct connections.
Why Update Your Light Fixtures?
A new light fixture does more than just light up a room—it’s a design statement. It can modernize a space, add critical task lighting for cooking, and even boost your home's value.
- Set the Mood: The right light creates a warm, welcoming feel that truly reflects your style.
- Improve a Room's Function: Good lighting makes life easier. A well-lit kitchen or bathroom isn't just more practical; it's safer.
- Boost Energy Efficiency: Upgrading to modern LED fixtures can slash energy use by up to 75% and last for years, a smart investment for any home.
A Quick Look at What's Ahead
We're going to cover everything from the must-have tools to making sense of the color-coded wires in your ceiling. You'll quickly see that even complex-looking fixtures follow the same fundamental wiring rules.
For many homeowners, the biggest hurdle is just getting started. Once you realize you're basically just connecting three sets of matching wires, the whole project feels much less intimidating.
Whether you're hanging a simple flush-mount or a statement piece, this knowledge will serve you well. If you're still deciding, it helps to explore the many types of light fixtures available to find your vision.
Gathering Your Tools and Materials for Success
A good DIY project starts with preparation. Learning how to wire a light fixture is no different, and having everything ready avoids frustrating trips to the hardware store.
Think of it like being a chef—you prep your ingredients before you start cooking. For this project, your "ingredients" are key tools that ensure your new fixture is installed securely and professionally.
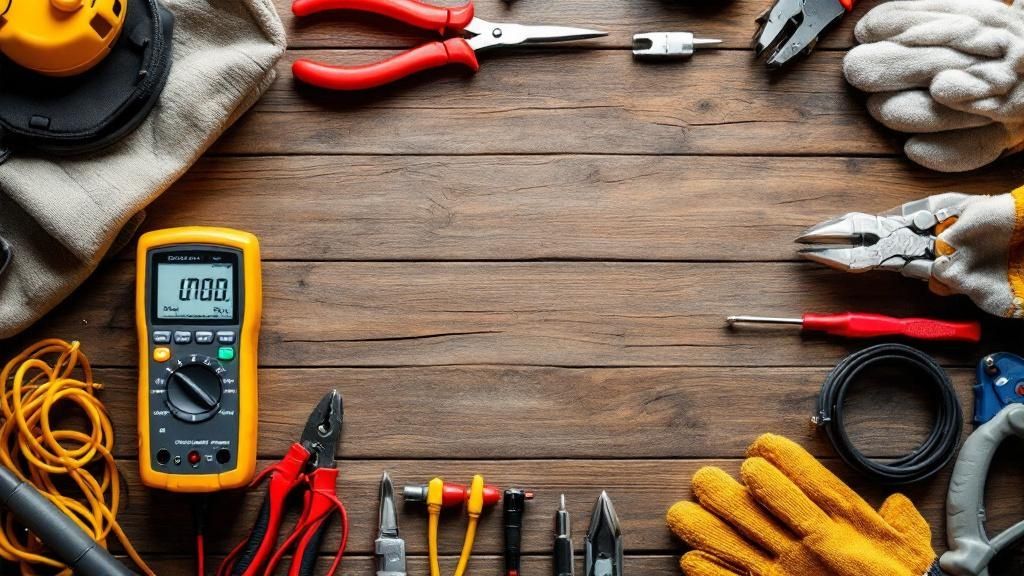
Must-Have Tools for the Job
A core set of tools will get you through almost any light fixture project. These are non-negotiable for safety and doing the job right.
- Non-Contact Voltage Tester: This is your most important safety tool. It's the only way to be 100% certain the power is off to the wires you’re about to touch.
- Wire Strippers: Essential for removing the plastic coating from wires without damaging the copper conductor inside. A clean strip is the first step to a safe connection.
- Screwdrivers: You’ll want both a Phillips head and a flathead. Most new fixtures use Phillips, but the existing electrical box might have flathead screws.
- Pliers: A good pair of linesman's pliers makes it easy to twist wires together tightly before you secure them with a wire nut.
- A Sturdy Ladder: Pick a ladder that lets you work comfortably at ceiling height without stretching or standing on your tiptoes.
A common mistake is trying to strip wires with a utility knife. This often damages the copper wire, which can lead to a weak or dangerous connection. A good pair of wire strippers is an inexpensive tool that makes a huge difference.
Selecting the Right Materials
While your new light fixture should come with its own mounting hardware, it's smart to have extra wire nuts on hand.
Here on the Central Coast, switching to energy-efficient lighting is a popular upgrade. You can explore a huge variety of modern styles in our collection of LED lighting fixtures that will brighten your home and lower your energy bill.
Heads up: a standard ceiling electrical box is typically only rated to hold up to 50 pounds. If you’re installing a heavy chandelier, this isn't strong enough.
Anything heavier needs a heavy-duty brace or a fan-rated box, which is anchored to the ceiling joists to handle the weight. Always check your fixture's weight and your box's rating before you start.
Understanding Your Home's Electrical Wiring
Before you can wire a light fixture, you need to understand the language of the wires in your ceiling box. Think of it like learning a few key phrases before traveling—it makes the process clearer.
Residential wiring is standardized for safety, meaning each colored wire has a specific job. Power flows from the breaker via the hot wire to the fixture, then returns through the neutral wire. The ground wire is your essential safety net.
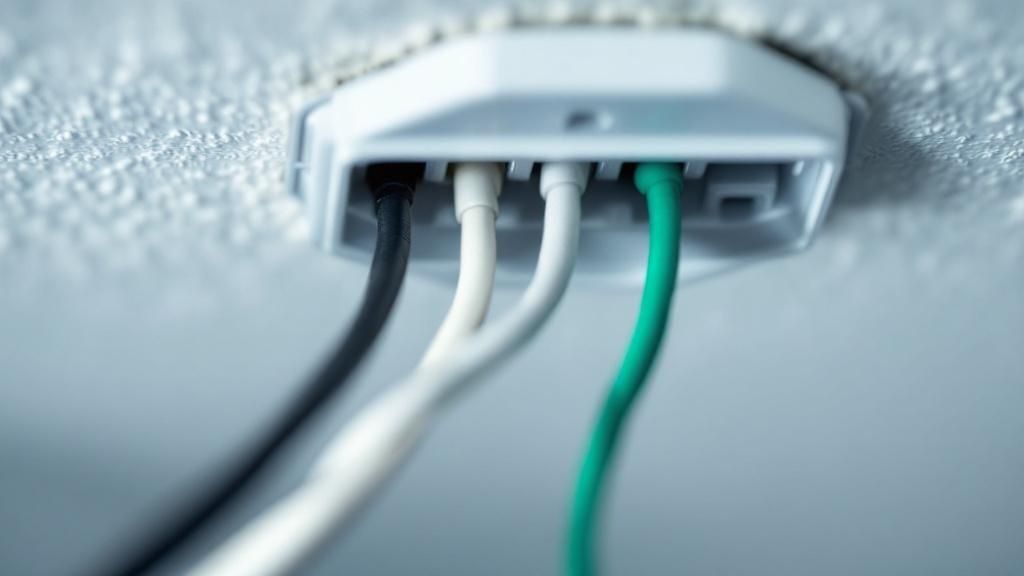
The Main Characters in Your Electrical Box
Once you remove the old fixture, you’ll find a bundle of wires. Getting to know them by their color and function is the most important part of the project.
Let’s break down the standard color code you'll find in most modern homes across the Monterey Peninsula and beyond.
- The Hot Wire (Black): This is the "live" wire that carries electrical current from the circuit breaker to the light fixture.
- The Neutral Wire (White): This wire completes the circuit by carrying the current back to the panel after it lights the bulb.
- The Ground Wire (Bare Copper or Green): This is a safety wire. It gives electricity a safe path to the ground in case of a short circuit, preventing shocks.
A Pro's Two Cents: That ground wire is non-negotiable. If your new fixture has a green or bare copper wire, it must be connected to the ground wire in your electrical box. If the box is metal, the ground wire should also connect to it with a green screw.
Decoding Your Home's Electrical Wires
To make identifying your wires even easier, here’s a quick-reference table.
| Wire Color | Common Name | Function |
|---|---|---|
| Black | Hot | Delivers electrical power from the source to the light fixture. |
| White | Neutral | Returns the electrical current to the source, completing the circuit. |
| Bare Copper/Green | Ground | Provides a safe path for electricity in case of a fault, preventing shock. |
Understanding these roles is fundamental. A solid grasp of your home's wiring, backed by an essential electrical inspection checklist, is what separates a safe project from a risky one.
What If My Wiring Looks Different?
While black, white, and copper/green is the modern standard, you might find surprises in older homes. It's not uncommon in classic homes from Santa Cruz to Salinas to find something that doesn't quite match.
For instance, you might see a red wire. This usually indicates a more complex setup, like a ceiling fan with a light kit or a three-way switch. Use your voltage tester to figure out what each wire does before you disconnect anything.
When wiring gets complicated, there's no shame in calling a professional. If you encounter wiring that looks old, frayed, or confusing, making that call is the smartest move.
Installing Your New Light Fixture Step-by-Step
You have your tools and understand the wiring. Now for the fun part—getting that old fixture down and the new one up.
The most critical step is to kill the power to the circuit. Don't just rely on the wall switch. Go to your main electrical panel and flip the correct breaker to the "OFF" position.
Then, use your non-contact voltage tester inside the ceiling box, near each wire. No lights or sounds from the tester confirms the circuit is dead and it’s safe to work.
Safely Removing the Old Fixture
With the power confirmed off, you can remove the old light. Most are held by a couple of decorative nuts or screws on the canopy (the base plate against the ceiling). Loosen those and support the fixture as it comes down.
A helper is great for this part. Once it's lowered, twist the wire nuts counter-clockwise to separate the fixture's wires from the ceiling wires.
A Pro Tip for Solo Work: Unbend a wire coat hanger into an "S" shape. Hook one end on the mounting bracket and the other on the fixture. This holds the weight, freeing both hands to disconnect the wires.
Inspecting and Preparing the Wires
With the old fixture gone, look at the wires in the ceiling box. Check the insulation for cracking or brittleness. If the wires look compromised, stop and call a licensed electrician.
If the wires are in good shape, prep them for the new fixture. If the exposed copper ends are bent, snip them off. Use your wire strippers to expose about 1/2 to 3/4 of an inch of fresh copper.
This infographic breaks down the basic wiring sequence.
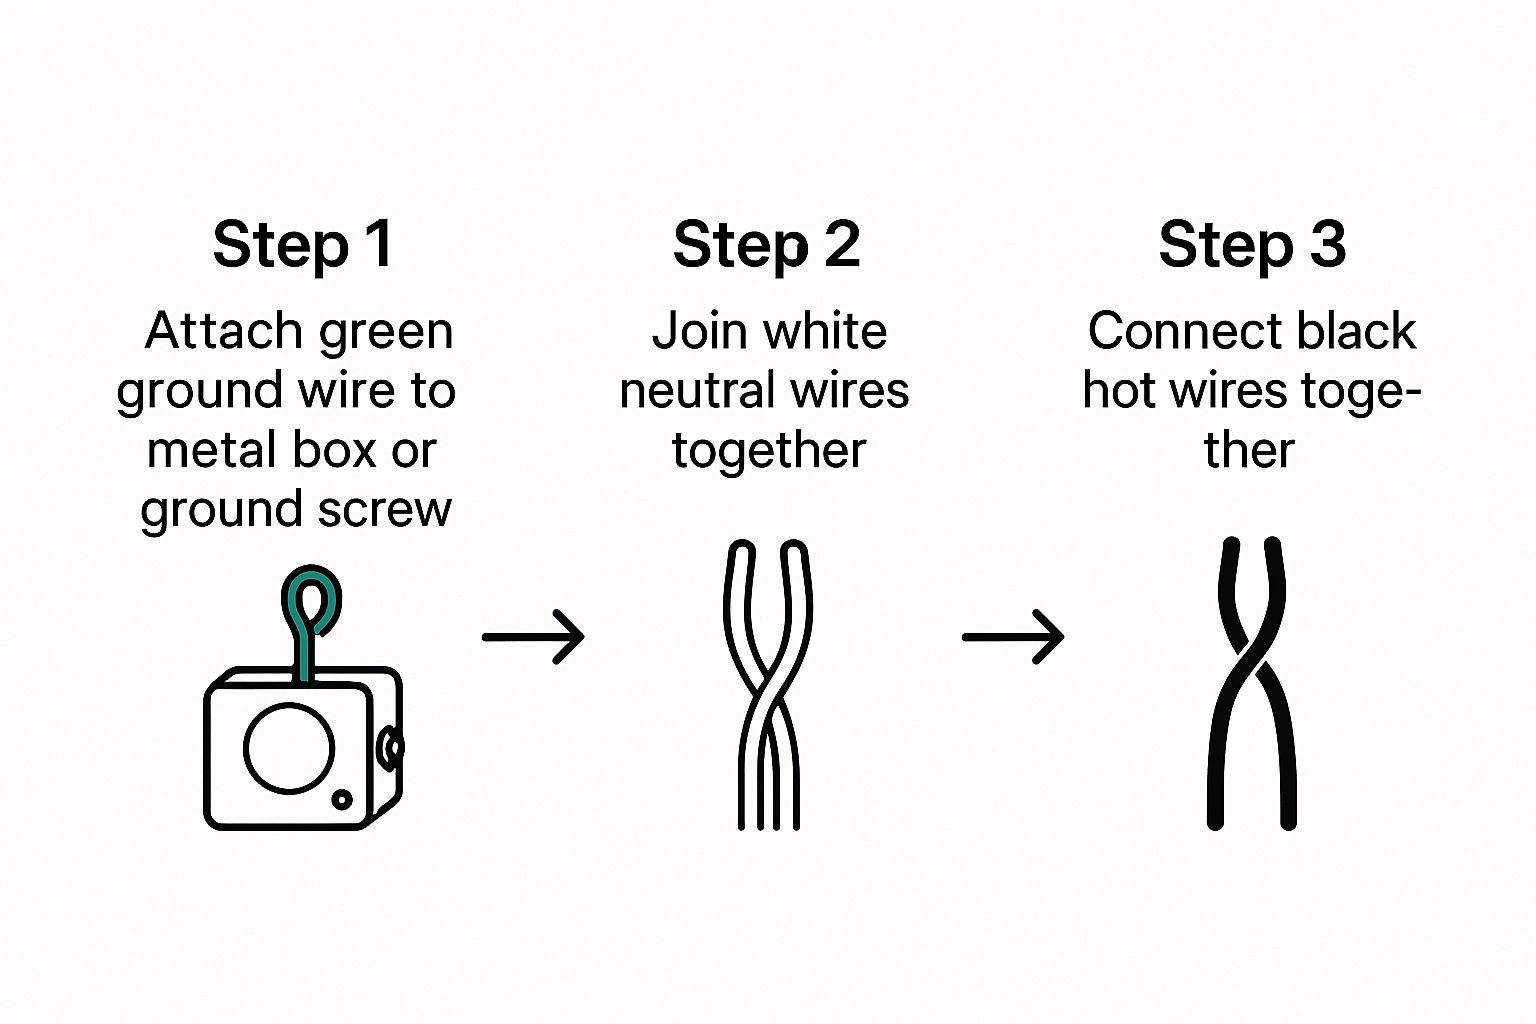
As you can see, it's a logical process. You always start with the safety wire (ground) and then connect the wires that complete the circuit.
Making the Right Connections
The main rule here is simple: match the colors. It's almost always the same.
- Ground to Ground: Connect the fixture’s ground wire (green or bare copper) to the ceiling's ground wire. If you have a metal electrical box, also loop the ground wire around the green grounding screw on the box.
- Neutral to Neutral: Connect the fixture’s neutral wire (white) to the ceiling’s neutral wire (white).
- Hot to Hot: Connect the fixture’s hot wire (black) to the ceiling’s hot wire (black).
To connect, hold the bare copper ends parallel and screw a wire nut over them clockwise until it's snug. Give each wire a gentle tug to ensure it's secure.
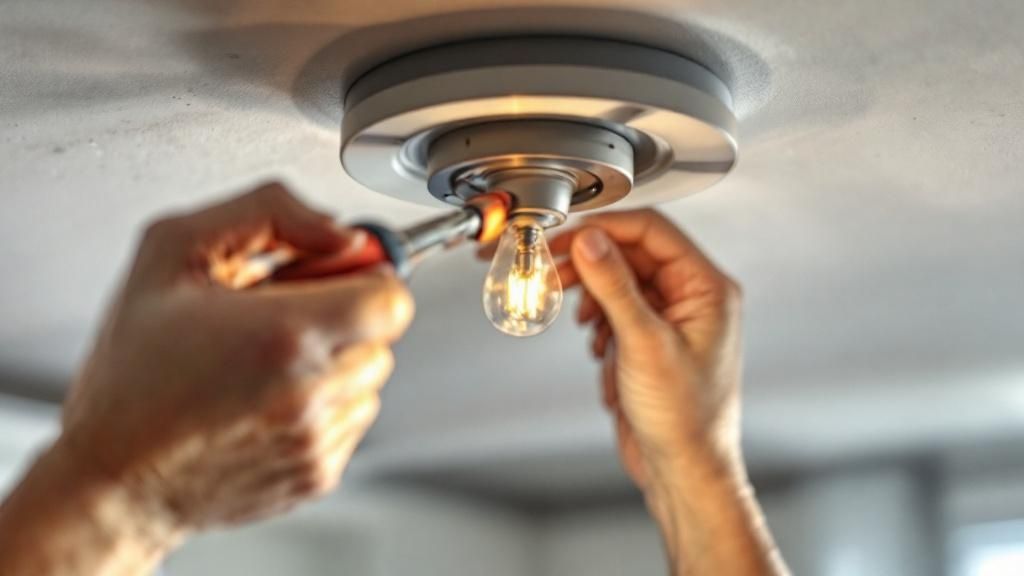
Mounting the New Fixture Securely
Gently tuck the wires and wire nuts up into the electrical box without putting strain on the connections.
Lift the new fixture’s canopy to the ceiling, lining up the mounting holes with the screws on the bracket. Secure the fixture with the provided decorative nuts or screws, but don't overtighten.
A well-chosen fixture can completely change a room. Knowing what kitchen lighting fixtures work best is a perfect example of how the right style elevates a space.
Finally, screw in your bulbs and attach any shades. Go to your electrical panel, flip the breaker back to "ON", and flick the wall switch to admire your work.
Upgrading to Dimmers and Smart Lights
Modern lighting offers more than a simple on/off function. As you get comfortable with wiring, it's worth exploring advanced systems like dimmers and smart lights.
This move toward advanced lighting is happening everywhere. The global market for lighting fixtures, which hit US$272.33 billion in 2025, is projected to reach US$653.09 billion by 2032. You can dig into the lighting fixture market insights on Coherent Market Insights for more data.
Picking the Right Dimmer for Your LEDs
One of the first upgrades homeowners tackle is adding a dimmer switch. This is also where things can go wrong if you have LED fixtures.
The problem is usually an old dimmer. Dimmers built for incandescent bulbs can't handle the low-wattage electronics in LEDs, causing flickering or buzzing. The fix is to use a dimmer switch made specifically for LED or CFL bulbs.
When shopping, look for these labels:
- CL (CFL & LED): Your go-to, all-purpose dimmer for most modern low-wattage bulbs.
- ELV (Electronic Low Voltage): The top-tier choice for the smoothest, most reliable dimming performance.
- LED+: A newer label indicating advanced compatibility across a wide range of LED bulb types.
Before you buy, check the dimmer manufacturer's compatibility list on their website. Cross-referencing your specific LED fixture will guarantee that smooth, silent dimming you're after.
Wiring a Standard Dimmer Switch
The good news is that wiring a basic dimmer is almost identical to a regular switch. After turning off the power, you'll see the dimmer usually has two black wires and a green ground wire.
One black wire connects to the hot wire from the wall (power source), and the other connects to the wire going to your fixture. The green wire connects to the ground wire. For most dimmers, it doesn’t matter which black wire goes where, but always check the instructions.
The Twist with Wiring Smart Light Fixtures
Smart fixtures that connect to Wi-Fi for app or voice control have a new requirement. They often need a constant supply of power to keep their "brain" on.
This means they require a neutral wire in the switch box. In many older homes, the wiring to a switch is a "switch loop," which only contains hot wires. If you open your switch box and only see black wires, you probably lack a neutral.
This is a key detail to check early. For instance, when planning a remodel, knowing if you need an electrician to run a neutral can save you headaches later. If you're updating a bathroom, check out our guide on how to choose vanity lighting.
Frequently Asked Questions (FAQs)
We get a lot of questions from homeowners here at The Home Lighter, from the historic homes in Santa Cruz to the new builds in Salinas. Here are a few common issues.
1. What if my home's wiring colors don't match my new fixture?
This is common in the older homes around the Monterey Peninsula. Don't panic. Use a non-contact voltage tester with the power on to identify which wire is hot. Then, turn the power off at the breaker, label the wires with electrical tape, and proceed with the color-matching rules.
2. Can I hang a heavy chandelier on a standard electrical box?
No. Standard plastic or metal ceiling boxes are only rated to hold a maximum of 50 pounds. For any fixture weighing more, you must install a heavy-duty, fan-rated electrical box that is braced directly to the ceiling joists. This is a critical safety rule.
3. My new LED light is flickering or humming. What's wrong?
The culprit is almost always an incompatible dimmer switch. Older dimmers can't handle the low power draw of modern LEDs. You need to swap it for a new dimmer specifically rated for LEDs (look for "CL," "LED+," or "ELV" on the packaging) for smooth, silent performance.
4. Is wiring a light fixture a safe DIY job?
For most homeowners, yes. Swapping an existing fixture is a manageable project if you are meticulous about safety—shutting off the power at the breaker and verifying with a voltage tester. The core process of connecting matching wires is straightforward.
5. When should I call a professional electrician?
A smart DIYer knows their limits. Call a licensed electrician if you encounter frayed or brittle wiring, old aluminum wiring, a missing ground wire in your electrical box, or a damaged/loose box. Your safety is always the top priority.
At The Home Lighter, Inc., we believe the right lighting transforms a house into a home. Whether you have a quick question or need a comprehensive lighting plan, our team in Pacific Grove is here to help. Visit us to explore our showroom and start your next project.