Beyond simply illuminating your yard, strategic landscape lighting techniques transform your outdoor space into a captivating, functional, and secure extension of your home. A well-designed lighting plan elevates your property’s curb appeal, highlighting architectural details and prized garden features. It’s about creating mood, drama, and depth, turning a flat, dark space into a dynamic, multi-layered environment.
This guide explores nine distinct landscape lighting techniques that professionals use to achieve stunning results. You will learn the principles behind methods like uplighting, moonlighting, and grazing, gaining insights on fixture placement and ideal applications. Whether you are accenting a majestic oak tree on your Monterey property or ensuring safe passage along a garden path in Santa Cruz, mastering these concepts is key.
1. Uplighting
Uplighting is one of the most dramatic and foundational landscape lighting techniques used to create stunning visual impact after dark. This method involves placing light fixtures at or near ground level and aiming them upward to illuminate a target. The effect highlights an object’s form, texture, and scale, turning ordinary yard features into majestic focal points.
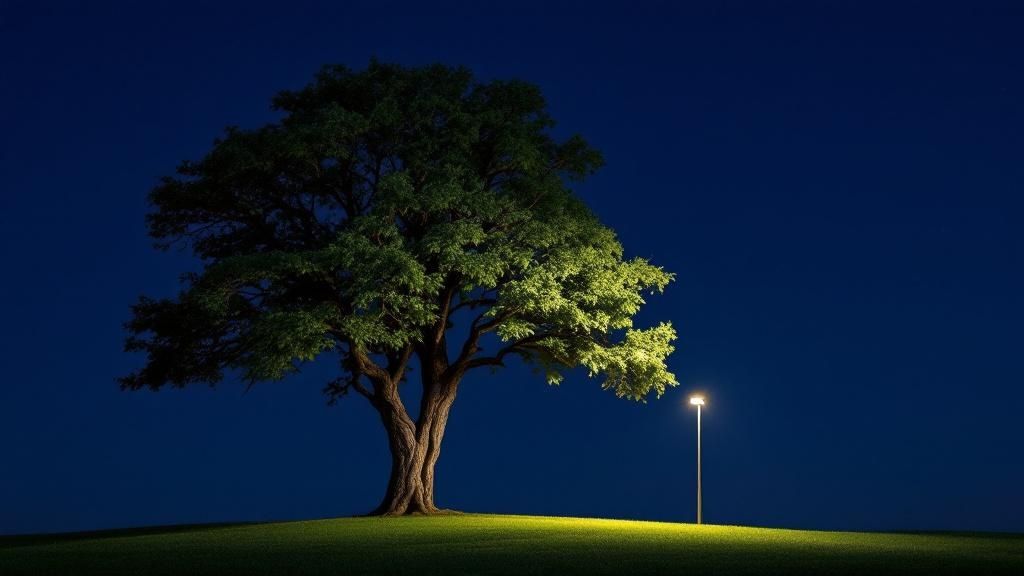
This technique excels at creating depth and drama, drawing the eye to key elements. It's commonly used to give architectural facades a monumental and elegant presence at night. For example, a well-placed uplight can transform a simple column or a tall palm tree into a powerful architectural statement.
How to Implement Uplighting
Effective uplighting requires careful placement and fixture selection to achieve a sophisticated look without creating harsh "hot spots." For our clients in the Monterey Peninsula, this technique beautifully highlights heritage oaks or unique architectural details.
- Fixture Placement: Position fixtures 2-3 feet away from the base of a tree or wall. This distance allows the light to spread gracefully up the surface.
- Beam Angle: Use a narrow beam angle (10-25 degrees) for tall subjects like pillars. A wider beam spread (40-60 degrees) works better for broad tree canopies or wide sections of a wall.
- Color Temperature: Choose a warm white light (2700K-3000K) to create an inviting, natural glow. This complements the warm, coastal aesthetic popular in areas from Santa Cruz to Monterey.
2. Downlighting (Moonlighting)
Downlighting, often called moonlighting, is a landscape lighting technique that creates an elegant, natural ambiance by mimicking the soft glow of moonlight. This method involves mounting light fixtures high up in trees and aiming them downward. The light filters through branches, casting subtle, dappled shadows on the ground below.
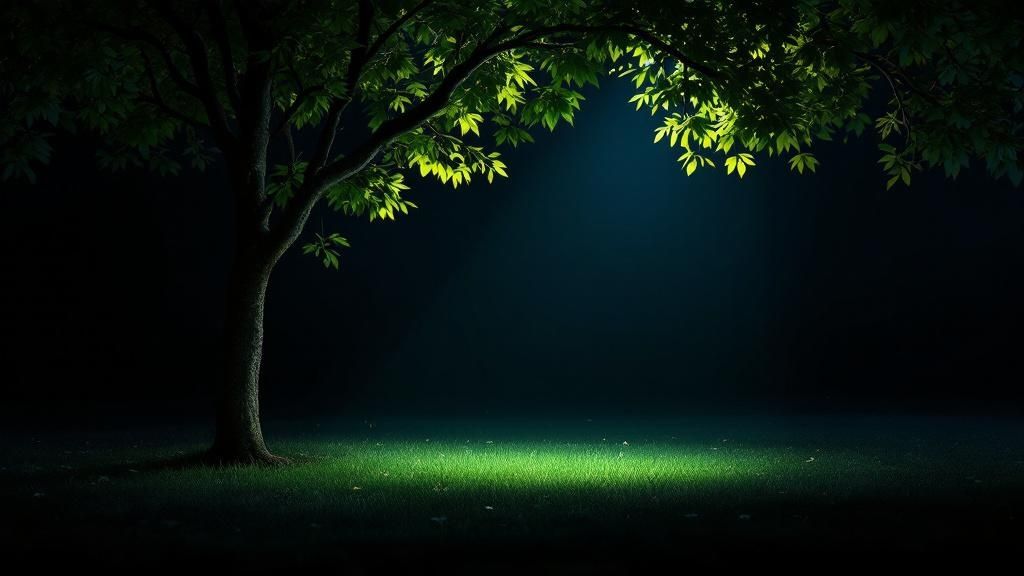
This technique is celebrated for its understated and immersive effect. The goal is to make the landscape feel naturally lit, providing safety and beauty without an obvious light source. This approach is one of the most sophisticated landscape lighting techniques available.
How to Implement Downlighting
Successful downlighting depends on strategic fixture placement to ensure a soft, natural look that avoids glare. For Central Coast properties with mature trees, this technique can transform an entire backyard into a serene evening retreat.
- Fixture Placement: Mount fixtures as high as possible in a mature tree, ideally 20-30 feet up. Use multiple fixtures in a large tree to create overlapping pools of light and avoid a harsh "spotlight" effect.
- Beam Angle: Select a wide beam angle (60-120 degrees) to cast a broad, soft wash of light over a large area. This is essential for achieving the dappled, moonlight-through-the-trees effect.
- Glare Control: Use fixtures with glare shields or cowls. Proper shielding is crucial to prevent direct glare for anyone walking underneath.
Integrating these fixtures with a smart home lighting installation allows for effortless control and scheduling.
3. Path Lighting
Path lighting is a fundamental landscape lighting technique that blends safety with aesthetic elegance. It provides secure navigation along walkways and garden paths while enhancing the surrounding landscape. Fixtures are positioned at a low height, casting light downwards to illuminate the walking surface without causing glare.
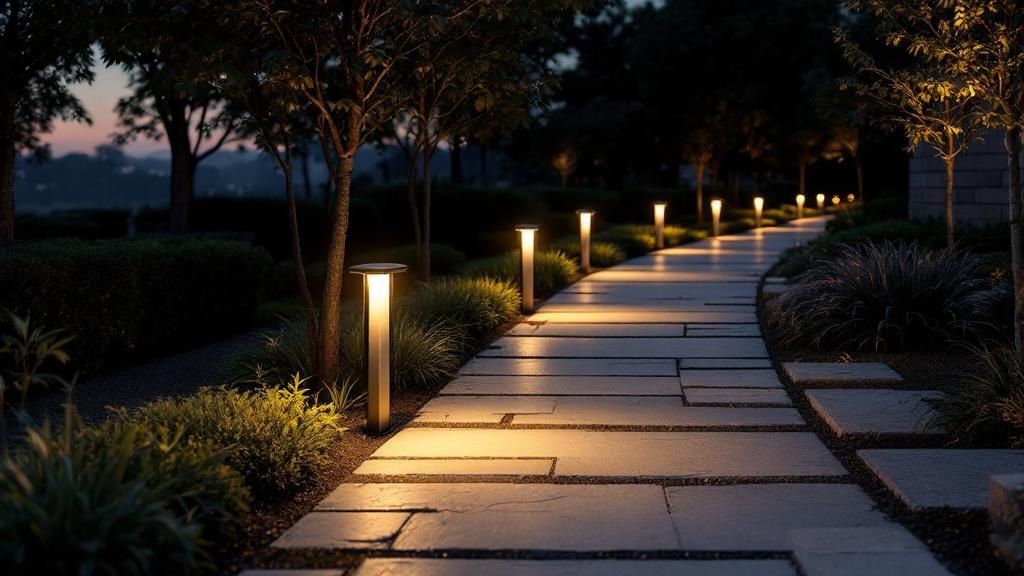
This technique creates a welcoming feel, guiding guests and residents safely through a property after dark. The goal is to provide just enough light for wayfinding while adding a subtle, decorative rhythm to the landscape. According to the U.S. Department of Energy, LED lighting, often used in path lights, uses at least 75% less energy than incandescent lighting.
How to Implement Path Lighting
Properly implemented path lighting prevents trips and falls while contributing to the overall design scheme. For homeowners along the Central Coast, it’s a perfect way to guide guests through a garden.
- Fixture Placement: Space fixtures approximately 6-8 feet apart to create overlapping pools of light. Staggering the lights on opposite sides of a path can create a more natural, less runway-like effect.
- Fixture Height: Most path lights stand 18-24 inches tall. This height is ideal for illuminating the ground without obstructing views of your garden.
- Glare Control: Always choose fixtures with built-in shields that direct light downward onto the path. Explore our showroom for the latest in energy-efficient path lighting solutions.
4. Accent Lighting
Accent lighting is a targeted landscape lighting technique used to create visual interest by drawing the eye to specific features. Unlike broader methods, its purpose is to highlight select elements like sculptures, prized plants, or unique architectural details. This approach turns these objects into deliberate focal points.
This technique adds layers of depth and personality to a garden. By selectively illuminating key pieces, accent lighting adds a curated, gallery-like quality to the outdoor environment.
How to Implement Accent Lighting
Successful accent lighting requires precision to create a balanced, sophisticated design without overwhelming the scene. This is the perfect method for highlighting a unique coastal redwood or the texture of a stone retaining wall in your Monterey-area home.
- Rule of Three: When lighting a cluster of objects, such as boulders, aim to illuminate them in odd numbers. An arrangement of three or five lit elements feels more natural and visually pleasing.
- Fixture Selection: Use adjustable spotlights with a narrow beam spread (10-30 degrees) to precisely frame your target. This prevents light spill and creates a more dramatic effect.
- Layering: Integrate accent lights with softer, ambient lighting. This ensures your focal points stand out against a gently illuminated background, avoiding the harsh appearance of objects floating in darkness.
5. Silhouetting
Silhouetting is a dramatic landscape lighting technique that reverses the typical approach to illumination. This method places the light source behind the subject, casting it into a dark, crisp silhouette against a brightly lit background. The effect emphasizes shape and form over texture and color.
This technique excels at creating high-contrast art pieces in the garden. For example, you can silhouette distinctive plants against illuminated walls to showcase their unique forms. Modern residential designs use this technique to turn sculptural trees or statues into focal points.
How to Implement Silhouetting
Successful silhouetting depends on selecting the right subject and carefully positioning lights to wash the background evenly. This is an artistic technique, perfect for highlighting unique plant forms found in gardens from Santa Cruz to Monterey.
- Subject Selection: Choose objects with interesting and recognizable shapes, such as a Japanese maple or a sculpture. Dense, solid forms produce the strongest effect.
- Fixture Placement: Place fixtures between the subject and the background surface (a wall or fence). The goal is to hide the light source from view while fully illuminating the background.
- Beam Angle: Use wide-beam floodlights (60-120 degrees) to create a smooth, even wash of light. This prevents distracting hot spots and ensures the silhouette is sharp. Even in compact areas, this can add visual depth; learn more about lighting for small spaces on homelighterinc.com.
6. Grazing
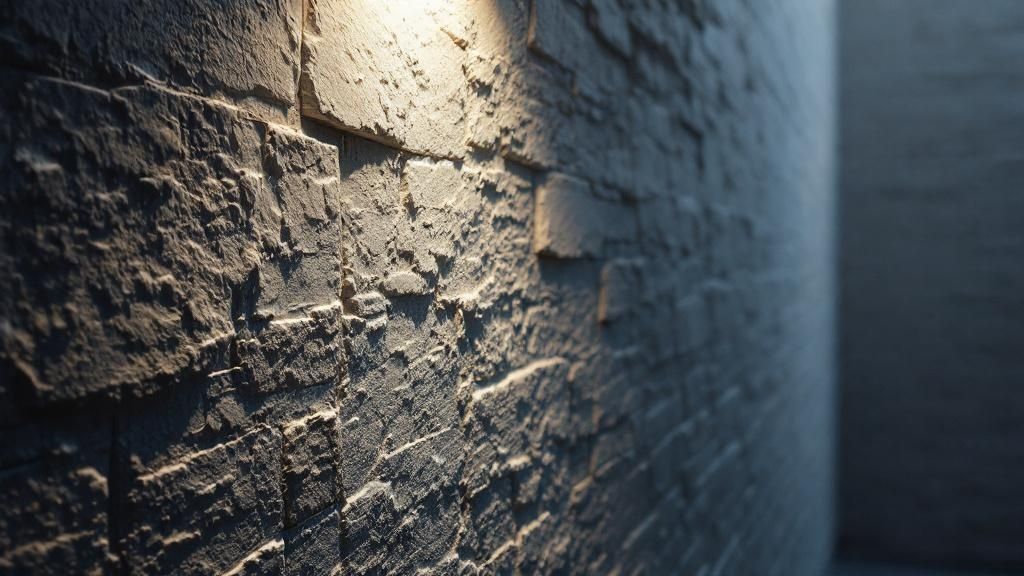
Grazing is a specialized landscape lighting technique that creates dramatic visual texture by accentuating the natural contours of a surface. This method involves placing light fixtures extremely close to a wall, aiming the beam parallel to its face. The result is a striking interplay of light and deep shadows that reveals intricate details.
This technique transforms flat surfaces into three-dimensional works of art. On a residential scale, modern homes in the Santa Cruz and Monterey areas use grazing on stacked stone, brick veneers, or textured stucco to create a sophisticated aesthetic.
How to Implement Grazing
Grazing is an art of precision; its success depends on exact placement. For Central Coast properties with distinctive materials like reclaimed wood or rustic stone, this technique adds architectural elegance. To explore more advanced methods, get inspired by these landscape lighting design ideas on homelighterinc.com.
- Fixture Placement: Position the light fixture just 6-12 inches away from the surface. The light beam should be aimed almost straight up or down to maximize the shadowing effect.
- Beam Control: Use fixtures with excellent beam control and minimal light spill. Linear fixtures or small, powerful spotlights are ideal for creating a clean grazing effect.
- Angle Testing: Before finalizing installation, test different fixture positions and angles. A slight adjustment can dramatically change the intensity of the shadows and the overall visual impact.
7. Shadowing
Shadowing flips the traditional lighting script by making the silhouette the main attraction. This landscape lighting technique involves placing a light fixture in front of an interesting object to cast its shadow onto a background surface, such as a house wall or privacy fence. The resulting shadow becomes the focal point.
This method adds a layer of artistry and intrigue to a garden, creating dynamic, moving art as breezes rustle leaves. It is frequently seen in Japanese gardens to highlight the delicate forms of ornamental grasses.
How to Implement Shadowing
Successful shadowing is all about the interplay between the light, the object, and the surface. The key is selecting an object with a distinct shape and having a clean background to serve as a canvas.
- Fixture Placement: Position a bright, focused light source between the plant or sculpture and the viewing area. The distance of the fixture from the object and the wall will alter the shadow's size and sharpness.
- Object Selection: Choose plants with open, intricate structures. Japanese maples or ornamental grasses provide the most compelling and detailed shadows.
- Surface and Scale: The background surface should be light-colored and relatively smooth to catch the shadow. Experiment by moving the light source closer to the object to create a larger shadow, or farther away for a smaller one.
8. Water Feature Lighting
Water feature lighting is a specialized technique that transforms fountains, ponds, and waterfalls into mesmerizing nocturnal displays. This method uses fixtures, often submersible, to illuminate water from within or from the edges. The goal is to highlight the movement, texture, and reflective qualities of water.
This technique creates a powerful sensory experience. High-end resort pools often use sophisticated underwater LED systems to create a serene and luxurious atmosphere for evening swimming.
How to Implement Water Feature Lighting
Properly lighting a water feature balances aesthetics with critical safety measures. For homeowners on the Central Coast, safety and material choice are paramount to ensure longevity.
- Fixture Selection: Only use fixtures specifically rated for underwater use (IP68 rating). These durable, sealed fixtures are designed for permanent submersion.
- Placement and Angling: Position underwater lights to illuminate the water's movement, such as at the base of a waterfall. Angle fixtures to avoid creating harsh glare that reflects off the water’s surface.
- Safety First: All water feature lighting circuits must be protected by a Ground Fault Circuit Interrupter (GFCI). This is a non-negotiable safety requirement.
9. Cross Lighting
Cross lighting is an advanced landscape lighting technique that elevates a subject to a fully realized three-dimensional feature. It involves illuminating a single object, like a specimen tree or sculpture, from two or more different angles. This multi-source approach fills in harsh shadows, revealing the full form and depth of the target.
This method provides a more natural and sophisticated illumination. High-end residential estates often use cross lighting to showcase signature trees from every viewpoint, ensuring they look stunning from the driveway, patio, and interior windows.
How to Implement Cross Lighting
Successful cross lighting is about balance and subtlety. This technique is particularly effective for highlighting the gnarled trunks of Monterey Cypress trees or accentuating unique masonry on Central Coast homes.
- Fixture Placement: Position two or more fixtures at approximately 45-degree angles to the subject and your primary viewing angles. This triangulated setup ensures light wraps around the object.
- Vary Light and Beams: Use a brighter "key light" from one side and a softer "fill light" from the other to create gentle shadows that define form. You can also combine different beam angles for a more complex effect.
- Fixture Concealment: Place fixtures discreetly behind other landscape elements, like shrubs or rocks, so the focus remains on the illuminated subject.
How The Home Lighter Can Help
As we've explored, landscape lighting is far more than simply placing fixtures in your garden. It's a powerful art form that uses light and shadow to craft atmosphere, enhance beauty, and extend the usability of your outdoor spaces. The nine distinct landscape lighting techniques covered in this guide are the foundational tools in your design toolkit.
Mastering these concepts transforms your approach from merely illuminating a space to truly designing an experience. A truly stunning design combines ambient, task, and accent lighting. For example, you might use soft moonlighting for general ambiance, path lighting for safe navigation, and uplighting to showcase architectural details.
Ready to transform your vision into a brilliantly lit reality? The experts at The Home Lighter, Inc. have been helping homeowners, designers, and builders on the Monterey Peninsula craft stunning and effective outdoor lighting plans for decades. Visit our Pacific Grove showroom or connect with us online to explore high-quality fixtures and receive personalized guidance on the best landscape lighting techniques for your unique property.
Frequently Asked Questions (FAQs)
What is the best color temperature for landscape lighting?
For most residential applications, a warm white color temperature between 2700K and 3000K is ideal. This range creates an inviting, natural glow that complements plants and architectural materials, aligning well with the coastal aesthetic of the Monterey Peninsula.
How do I avoid creating light pollution with my landscape lighting?
To minimize light pollution, use fixtures with shields or cowls, aim lights downward whenever possible, and only illuminate what is necessary. Avoid overly bright lights and consider using timers or dimmers to reduce usage during late-night hours. Techniques like downlighting and path lighting are inherently better at controlling light spill.
Can I mix different landscape lighting techniques in one design?
Absolutely. The most sophisticated and effective lighting designs layer multiple techniques. For example, you might use downlighting for overall ambient light, path lighting for safety along a walkway, and accent lighting to highlight a favorite tree or sculpture.
How important are beam angles in landscape lighting techniques?
Beam angle is critical. A narrow beam (10-25 degrees) is perfect for highlighting tall, thin objects like columns or tree trunks. A wide beam (40-120 degrees) is better for washing a broad surface like a wall or a tree canopy. Choosing the correct beam angle ensures light is placed precisely where you want it.
How can I make my landscape lighting more energy-efficient?
The best way to improve energy efficiency is to use LED fixtures, which consume up to 80% less energy and last much longer than traditional halogen bulbs. Additionally, incorporating smart controls, timers, and dimmers allows you to use your lights only when needed, further reducing energy consumption.