A good rule of thumb is one recessed light for every 4 to 6 square feet of ceiling space. But this is just a starting point. The right number depends on your room's purpose, ceiling height, and the lights you pick.
The Secret to Perfect Room Lighting Starts Here
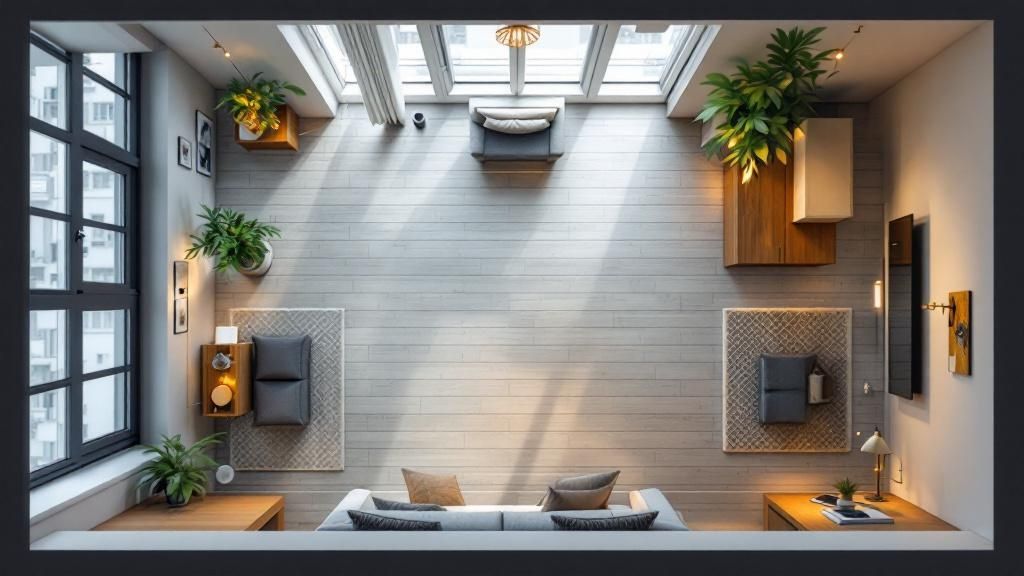
Deciding how many recessed lights to install can feel tricky. Too few lights create dark, gloomy corners. Too many, and your ceiling looks like an airport runway.
The goal is to find the right balance. You want a space that feels bright, welcoming, and works for what you do in it.
This guide will explain the basic ideas that lighting designers use. We'll skip the confusing jargon and give you simple, practical steps. This will help you create a great lighting plan, whether you're updating a classic Carmel cottage or a modern Salinas home.
Why Planning Is So Important
A good lighting plan does more than just light up a room—it makes it better. The right lighting can make a small room feel bigger and highlight nice features. It can also create different zones for activities.
Before you start, it's smart to understand what professional lighting installation services can do. A pro can make sure the job is done safely and correctly, especially if you're not comfortable with wiring.
Basic Ideas to Understand
Let's learn a few simple terms before we start measuring. These are the building blocks of any good lighting design.
- Lumens: This is just a measure of how bright a light bulb is. More lumens means a brighter light.
- Foot-Candles: This tells you how bright the light is when it hits a surface, like your floor or countertop. Different tasks need different amounts of light.
- Room Function: This is the most important factor. A kitchen where you chop vegetables needs much brighter light than a living room for watching movies.
Good lighting is about more than just brightness. It's about creating a mood. Recessed lights provide the main layer of light for a room.
Understanding these basics helps you think like a designer. It makes sure your lighting is not just okay, but great for how you live. The next sections will help you turn these ideas into a real plan.
Calculating Your Lighting Needs
Before you decide where to put your lights, you need to know how much light your room needs. This isn't a guess; it's a simple calculation that starts with a tape measure. The first step is to find your room's square footage.
Step 1: Measure Your Room's Square Footage
To find the square footage, multiply the room's length by its width.
If your room has an L-shape, just break the space into rectangles. Find the square footage of each one, then add them together.
This number is the starting point for everything else.
Step 2: Determine Lumen Requirements
Now, think about how you use the room. The right amount of brightness is measured in foot-candles (fc). A living room might only need 10–20 fc, while a kitchen needs a brighter 30–50 fc.
To find the total lumens (light output) your room needs, multiply its square footage by the needed foot-candles.
Let's use a 150-square-foot kitchen as an example. You want it to be bright, so you aim for 40 foot-candles.
150 sq ft x 40 fc = 6,000 total lumens
This target tells you how much total light all your new fixtures need to produce.
Now, the math is easy. A common 6-inch LED recessed light gives off about 800 to 1,200 lumens. To find how many lights you need, divide your total lumen target by the lumens of one fixture.
A well-lit room has even, comfortable light. Getting the spacing and lumen count right avoids harsh bright spots or glare.
If your target is 6,000 lumens and your lights are 1,000 lumens each, you will need six lights. This simple math helps you get a professional result. For tips on choosing lights, check out our guide to energy-efficient lighting solutions.
Key Factors That Change Your Plan
The math is just a start. A few other things can affect your final plan:
- Ceiling Height: With tall ceilings, light has to travel farther. This can make it seem dimmer when it reaches the floor.
- Beam Angle: Some lights have a narrow beam (like a spotlight), while others have a wide beam (like a floodlight).
- Wall Color: Dark walls absorb light, so you might need more lumens than in a room with light-colored walls.
- Dimmer Switches: These are always a good idea. Dimmers let you change the brightness for different activities.
My best advice? Buy one light and test it in the room at night before you cut any holes. This is the only way to know if you like how it looks in your space.
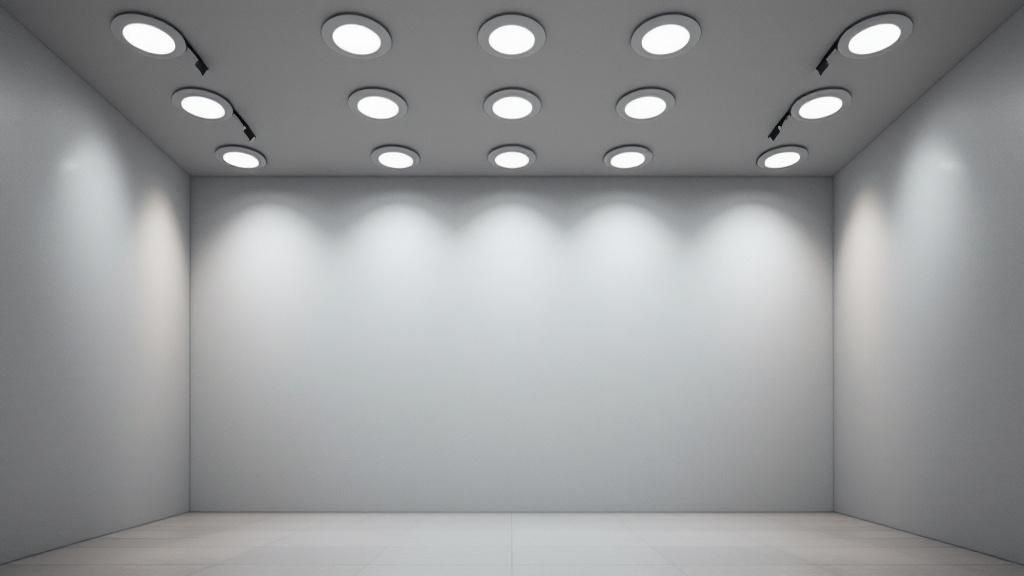
Mastering Recessed Light Spacing and Layout
Knowing how many lights you need is the first step. But where you put them is what really makes the difference. Good spacing creates an even, welcoming light that gets rid of dark corners.
The goal is to make the light feel balanced and natural. You don't want it to look like a bunch of spotlights on your ceiling.
Spacing Basics: Simple Rules to Follow
A good starting point for spacing is to divide your ceiling height by two. The answer is how far apart to place each light.
For a standard 8-foot ceiling, you should place your lights about 4 feet apart. If you have taller 10-foot ceilings, common in many Monterey homes, you can space them about 5 feet apart.
It's also important to think about the distance from the walls. Place the first row of lights about 2 to 3 feet away from the walls. This simple trick prevents ugly shadows and makes the room feel bigger.
Recessed Lighting Spacing Rules of Thumb
| Spacing Guideline | Recommended Distance | Why It Matters |
|---|---|---|
| Between Lights | Ceiling Height ÷ 2 | Creates an even wash of light without dark spots. |
| From Walls | 2–3 feet | Prevents harsh shadows and makes the room feel more open. |
| Over Task Areas | Directly Above | Lights up countertops or desks so you don't cast a shadow on your work. |
Following these simple rules helps ensure your layout looks great and works well.
Common Layout Patterns
Different rooms need different layouts. A grid pattern is great for general light in living rooms. But kitchens and home offices need a more focused approach.
- Grid Layout: This is your best choice for even, all-over light. You place lights in a simple grid across the ceiling.
- Task-Oriented Layout: In a kitchen, place lights right over your countertops, sink, and island. This puts bright light where you work.
- Perimeter Layout: Placing lights around the edges of a room can highlight artwork or make a small room feel bigger.
The best thing you can do is sketch your room on paper. Mark where the furniture goes, then draw in where you think the lights should be. This can help you avoid mistakes.
This image shows how ceiling height and placement create the right light spread.
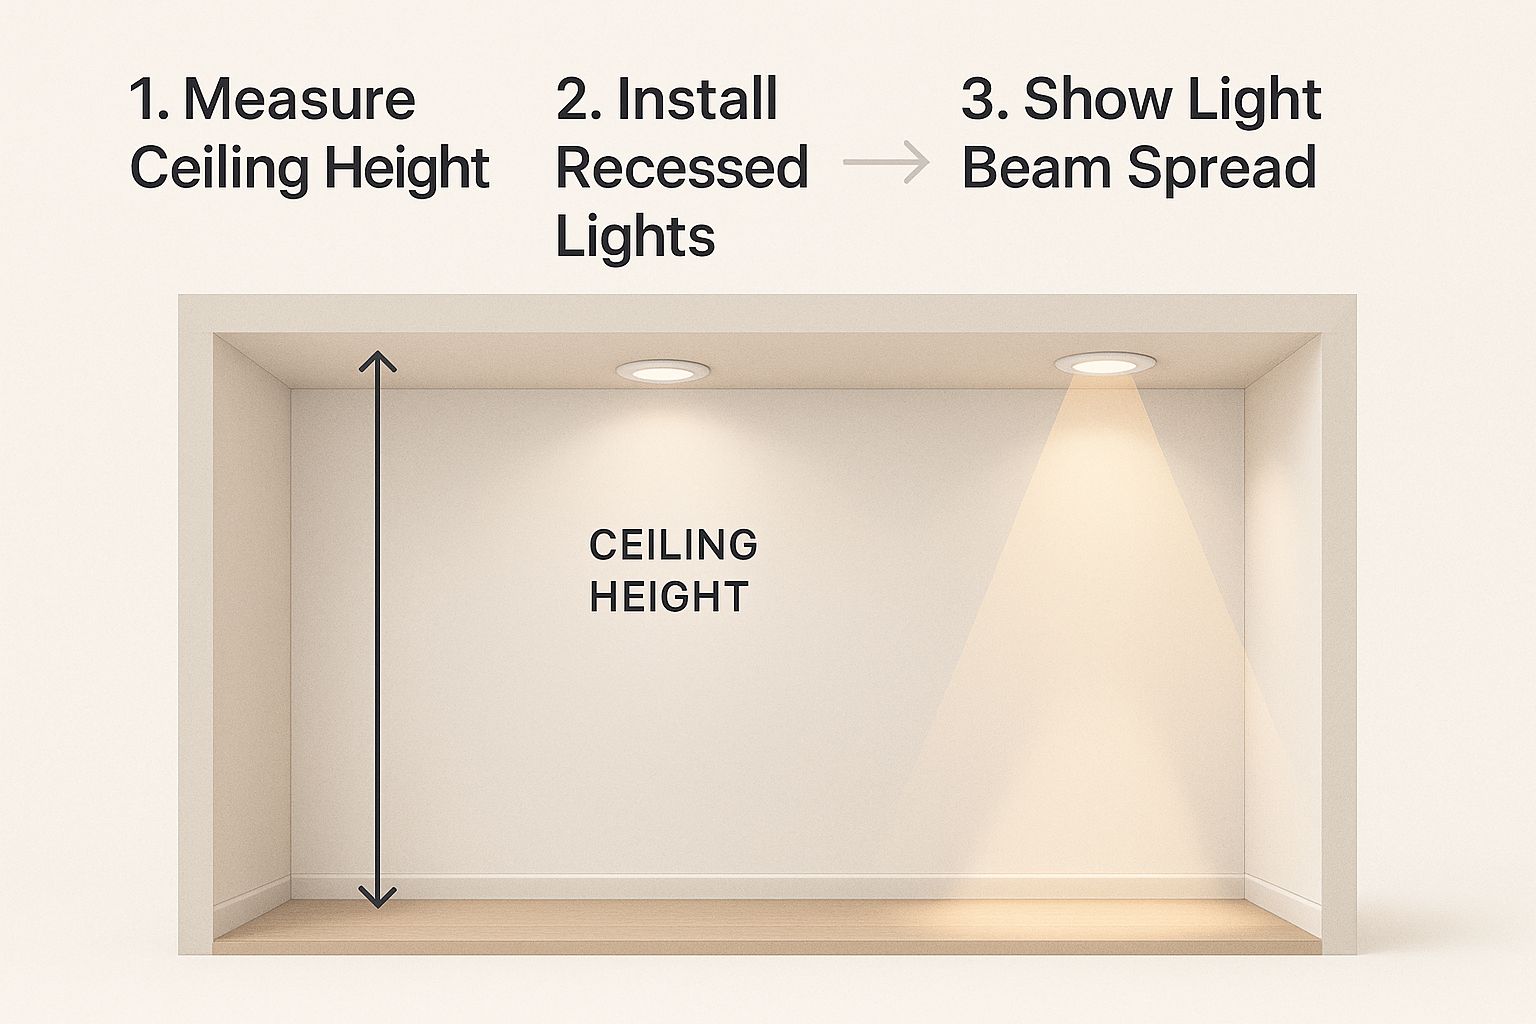
As you can see, the light from each fixture should overlap a little at floor level. This creates a smooth layer of light with no dark spots.
Adapting to Central Coast Homes
Many homes here on the Central Coast have unique features like vaulted ceilings or wood beams. These are opportunities, not challenges.
For vaulted ceilings, use lights with adjustable "gimbals." These can be tilted to point the light straight down. For rooms with beams, placing lights in the spaces between them creates a nice, orderly look.
If you have a plan and are ready for the next step, check out our guide on how to install recessed lights.
Choosing the Right Recessed Lighting Fixtures
Once you know how many lights you need and where they will go, it's time to pick the actual fixtures. Your choices here will have a big impact on how your room looks and feels.
It's about more than just brightness. You'll also need to decide on the size, the shape of the light beam, and its color.
Fixture Size: 4-Inch vs. 6-Inch
The first decision is the size of the light. The two most common options are 4-inch and 6-inch. While 6-inch lights were popular for a long time, today 4-inch fixtures are more common for a clean, modern look.
- 4-Inch Fixtures: These are great for a simple, modern style. They blend into the ceiling and let your home's design stand out.
- 6-Inch Fixtures: These can still be a good choice for general lighting in very large rooms with high ceilings. They tend to spread light over a wider area.
Beam Angle and Color Temperature
Two other things are very important: beam angle and color temperature. The beam angle decides if the light is a narrow spotlight or a wide floodlight. A narrow beam is great for highlighting art. A wide beam is for general room lighting.
Color temperature is measured in Kelvin (K). This describes the color of the light.
A low Kelvin number gives you a warm, cozy, yellow-toned light. A high Kelvin number creates a cool, crisp, blue-toned light. Getting this right is the key to setting the perfect mood.
A living room or bedroom feels best with a warm light around 2700K. But in a bathroom or office, a cooler 3000K to 3500K light is better for seeing clearly.
Smart Tunable LEDs
For the most flexibility, smart tunable LED lights are a great choice. They let you control both the brightness and the color temperature from an app on your phone.
This means you can have bright, crisp light for working during the day. Then you can switch to a warm, dim glow for relaxing at night, all from the same light.
A great lighting plan uses different types of light. To see how recessed lights compare to other options, read our guide on track lighting versus recessed lighting. You can also add other light sources, like modern table lamps like the G Shaped Table Lamp with Speaker.
Common Lighting Mistakes and How to Avoid Them
Knowing how many lights you need is a great start. But avoiding common mistakes is what makes a lighting project truly successful. We've seen a few common problems that are easy to avoid.
One of the most common mistakes is the "runway effect." This happens when lights are installed in one straight line down a hall. It creates a harsh, tunnel-like feeling instead of a welcoming space.
Problems with Glare and Shadows
Another issue is putting lights where they create glare. For example, placing a light right over a sofa means you'll stare into a bright bulb when you try to relax.
Bad placement can also create shadows where you need light most. If a light is behind you at a kitchen counter, your body will block the light. This makes tasks like chopping vegetables hard and unsafe.
Pro Tip: Always think about how you use the room and where your furniture will go first. The goal is to light up your tasks, not just the empty space.
Forgetting Dimmers and Layering
Perhaps the biggest mistake is forgetting to install dimmer switches. For recessed lighting, dimmers are a must-have. They let you change a room's mood instantly, from bright and functional to soft and cozy.
Finally, relying only on recessed lights is a mistake. The best lighting designs use layers of light.
- Ambient Layer: This is your general, all-over light from recessed fixtures.
- Task Layer: This is focused light for specific jobs, like pendants over an island.
- Accent Layer: This is light used to highlight art or other features, like wall sconces.
Thinking in layers makes your space bright, interesting, and useful. Learn more in our guide to common home lighting mistakes.
How a Lighting Expert Can Perfect Your Plan
Feeling a little overwhelmed by the calculations and options? That's normal. This is where an expert can make all the difference.
A lighting plan is about more than just numbers. It's about understanding your home's design and the mood you want to create.
A lighting consultant makes the process simple. We help you choose the right fixtures and create a layout that improves your space without costly mistakes.
Well-planned recessed lighting is very popular. The global market for it reached $33.08 billion in 2023. You can read more about this growing market at Straits Research.
Working with a local expert means your plan is tailored to our Central Coast lifestyle. We know how to brighten a room on a foggy Monterey morning and create a warm space for a cozy evening.
Our team at The Home Lighter is here to help. For more details, check out our recessed lighting layout guide to get started.
Frequently Asked Questions About Recessed Lighting
Homeowners often ask us these questions in our showroom. This quick guide can help clear up any final details.
Can I mix different sizes of recessed lights in the same room?
Yes, you can. Mixing sizes can be a sign of a good lighting plan. You could use larger 6-inch lights for general light in a big room. Then, you could use smaller 4-inch lights to highlight a kitchen island or art. The key is to be consistent. Use the same size in one specific area to keep the look clean and organized.
Do I need recessed lights in a bedroom?
This depends on your personal taste. For older, traditional homes, some designers avoid recessed lights to keep the classic feel. But if you need to see clearly to get ready in the morning, a few recessed lights on a dimmer can be very helpful. A good solution is a nice chandelier for general light, with a few recessed lights added only where you need them.
What's the best way to light a sloped or vaulted ceiling?
For sloped ceilings, use lights with an adjustable trim. These are called gimbal or eyeball trims. They pivot so you can aim the light straight down. This is important because regular lights on a slope will create strange shadows. Gimbals make sure the light is even and useful.
How many recessed lights should I put in my kitchen?
The kitchen is one room where you don't want to have too little light. The most common mistake is not using enough lights, which makes countertops dark. A layered plan works best for kitchens. Use a grid of recessed lights for general light. Then, add task lights directly over your sink, stove, and counters. A few pendants over an island can add style and focused light.
Why is a lighting layout plan so important?
A layout plan is your blueprint for a successful lighting project. It helps you avoid common mistakes like the "runway effect," dark corners, or unwanted glare. By planning where each light goes, you make sure the entire room is lit evenly and effectively. A good plan considers furniture placement and how you use the space, which leads to a result that is both beautiful and practical.
Ready to create a lighting plan that perfectly fits your home and lifestyle? The experts at The Home Lighter Inc. are here to help you navigate every decision with confidence. Stop by our Pacific Grove showroom or visit us online to get started.