Installing recessed lighting involves a few key steps: planning the layout, getting the right materials, prepping the ceiling, wiring, and installing the lights. Taking time to plan is the most important part. A good plan ensures your lights look professional and create beautiful, even lighting.
Mapping Out Your Recessed Lighting Plan
Before you pick up any tools, creating a good lighting plan is key. A great layout looks like it was designed for the room. A bad one can create strange shadows or harsh glare.
Planning everything out makes sure your new lights improve your space. It's what makes a DIY project look like a pro did it.
Recessed lighting is popular for its clean and efficient look. The global market for these lights was valued at about $33.08 billion in 2023. It is expected to grow to nearly $85 billion by 2032, showing how many homeowners love this sleek option.
Calculating Your Lighting Needs
First, you need to figure out how many lights your room needs. A common mistake is using too few lights, which leaves dark corners. Using too many can make a room feel like a hospital.
Here’s a simple formula to get you started:
- Find the room's square footage: Multiply the room’s length by its width.
- Find the total wattage needed: Multiply the square footage by 1.5.
- Find the number of lights: Divide the total wattage by the wattage of the bulb you will use.
For example, a 12-foot by 15-foot room is 180 sq. ft. It needs about 270 total watts (180 x 1.5). If you use 10-watt LED lights, you would need about 27 lights (270 / 10). This is just a guideline, as a kitchen might need more focused light.
A Simple Formula For Spacing
Once you know how many lights you need, you have to decide where to put them. Proper spacing is very important for a balanced look. It helps you avoid a single, harsh line of lights.
A good rule of thumb is to divide your ceiling height by two. For a standard 8-foot ceiling, you should space your recessed lights about 4 feet apart from each other.
To avoid shadows on your walls, place the first row of lights about 2 to 3 feet away from the wall. This stops the light from creating a scalloped shadow effect. For more help, check out our detailed recessed lighting layout guide.
Matching Styles to Your Home
Recessed lighting comes in many styles. The trim and beam angle can complement your home's look. This is especially true for the diverse homes in our area, from modern Santa Cruz bungalows to classic Carmel estates.
- Trim Styles: Pick a trim that matches your decor. A simple white trim blends into a white ceiling. A black or metallic trim can add a modern touch.
- Beam Angles: The beam angle decides how wide the light is. A narrow beam (under 25 degrees) is great for highlighting art. A wider beam (40 degrees or more) is best for general room lighting.
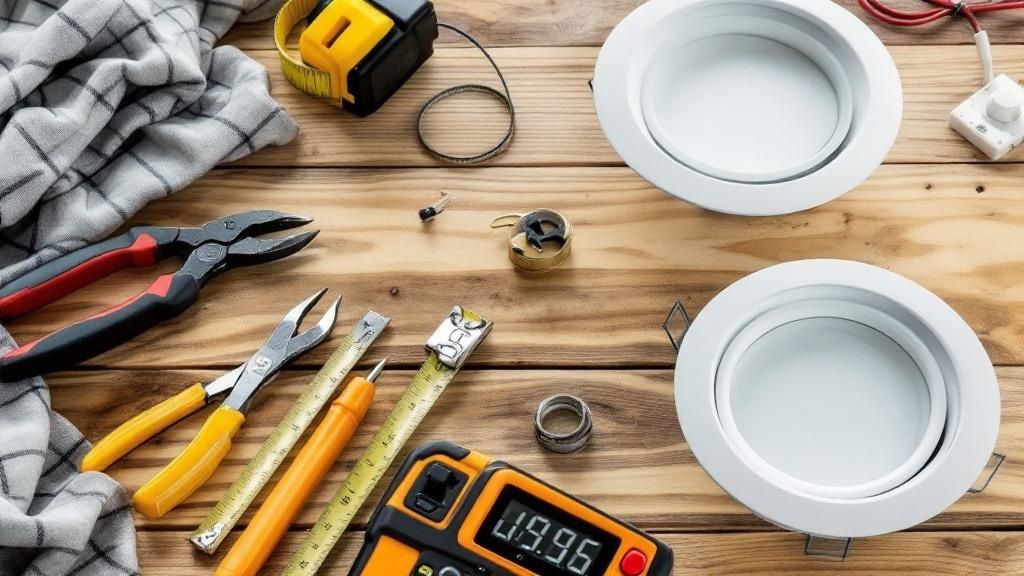
Selecting The Right Lights and Gathering Your Tools
Starting a project with the right tools makes it much easier. Getting everything you need before you start will save you time and help the installation go well. Let's go over the lights and tools you will need.
Recessed lighting is popular because it offers a clean, uncluttered look. The lights fit into hollow spaces in the ceiling, giving you light without taking up space. It's a popular choice for a reason—the global market was valued at $33.08 billion in 2024.
Every recessed light has three parts: the housing (the part in the ceiling), the trim (the part you see), and the bulb. Choosing the right components is key to a great result.
Choosing The Right Recessed Light Housing
The first big choice is the housing, also called a "can." This is the main body of the light fixture. There are two types for different situations.
You have two main options:
- New Construction Housing: This is for new buildings or when you have open ceilings with exposed beams (joists). These housings attach directly to the joists for a very sturdy fit.
- Remodel Housing: This is what you need if you are working with a finished ceiling. These "cans" are designed to slip into a hole and are held in place with clips.
For most homeowners on the Monterey Peninsula who want to upgrade their lighting, the remodel housing is the right choice.
Choosing Your Recessed Light Housing
Use this chart to help you choose the right housing for your project.
| Feature | New Construction Housing | Remodel Housing |
|---|---|---|
| Best For | Unfinished ceilings with exposed joists | Existing, finished drywall ceilings |
| Installation Method | Attaches directly to ceiling joists with hanger bars | Inserts through a hole and secures with retaining clips |
| Ceiling Access | Requires access to the ceiling framing | Only requires access from below (the room itself) |
| Stability | Very sturdy, as it's part of the ceiling structure | Held securely by clips against the drywall |
If your ceiling is already finished, a remodel housing is your only real choice. If you are doing a big renovation, new construction housings are more secure.
IC Rating: A Critical Safety Feature
You must pay attention to the fixture's IC rating. This stands for "Insulation Contact," and it is an important safety standard. An IC-rated housing is made to be in direct contact with insulation without causing a fire.
A non-IC-rated fixture needs at least three inches of space from all insulation. In homes along the Central Coast, ceilings are almost always insulated. Using IC-rated fixtures is a non-negotiable safety requirement.
Always check the box for the IC rating before you buy.
Selecting Your Bulbs and Trims
Now you can choose the trims and bulbs that will define your room's look. Modern LEDs give you a lot of control over the mood.
When picking bulbs, the most important thing is color temperature, measured in Kelvin (K).
- 2700K – 3000K: This gives a warm, cozy, yellow light, like an old lightbulb. It’s perfect for living rooms and bedrooms.
- 3500K – 4000K: This is a neutral, bright white light. It's great for kitchens and bathrooms where you need clear light for tasks.
- 5000K+: This is a cool, bluish light like natural daylight. It’s often too bright for homes but works well in garages.
The trim is the ring you see on the ceiling. A plain white trim is popular because it blends in. You can also choose other finishes like black or bronze to match your room's hardware.
If you are thinking about other options, our guide on track lighting vs. recessed lighting can help you decide.
Your Essential Tool Checklist
Having these tools ready will make the job much smoother.
- Drill with a Hole Saw Attachment: The best tool for cutting a perfect circle in drywall.
- Drywall Saw: Good for cleaning up edges or cutting in small spaces.
- Non-Contact Voltage Tester: A safety tool to make sure the power is off before you touch wires.
- Wire Strippers and Cutters: Needed to prepare electrical wires for connection.
- Tape Measure and Pencil: For marking the light locations accurately.
- Safety Goggles: Protect your eyes from drywall dust.
Preparing Your Ceiling for a Clean Installation
Now it is time to get the ceiling ready. This step is the secret to a professional-looking installation. Taking extra time now will prevent problems later.
Before you cut any holes, you need to know what is behind the drywall. A stud finder will help you locate the wooden beams (joists) in your ceiling. It is very frustrating to cut a hole only to find a joist in the way.
Locate Ceiling Joists and Mark Your Layout
Use a stud finder to find the ceiling joists where you plan to put your lights. Lightly mark where each joist is with a pencil. Knowing where they are lets you adjust your plan to avoid them.
What if a joist is right where you want a light? You have a few options:
- Shift the whole layout: Move all your planned light locations a few inches to one side.
- Adjust a single light: If it won’t look strange, you can just move the one problem light.
- Re-evaluate the layout: Sometimes it is better to change the spacing to work with the joists.
Once you have your final spots, mark them on the ceiling. Your light kit should come with a paper template. Use it to trace a circle at each location. This ensures your cuts will be the right size.
Pro Tip for Monterey Homes: Many older homes on the Monterey Peninsula have plaster ceilings, not drywall. Plaster can chip easily. To get a clean cut, score the circle with a sharp utility knife first before using a hole saw.
Prioritize Electrical Safety Above All
This is the most important step: turning off the power correctly. Never assume a circuit is dead just because a light switch is off. You must turn off the power at the main electrical panel.
Go to your circuit breaker box. Find the breaker for the room you are working in and flip it to the “OFF” position. It is a good idea to put tape over the breaker so no one turns it back on by accident.
Even after flipping the breaker, check that the power is really off. Use a non-contact voltage tester and hold it near the wires of an existing fixture. If the tester stays silent and does not light up, the power is off and it is safe to work.
A Practical Guide to Wiring Your New Lights
With the ceiling ready, it's time for the wiring. This can seem hard, but it is just a process of connecting the right wires together. We'll go through it step-by-step to make sure your connections are safe and secure.
Learning to wire lights is a great skill for a homeowner. The goal is to create a safe circuit to power your new lights. We will use the most common method: connecting the lights in a series, one after another.
This simple image shows the three main steps of the installation process.
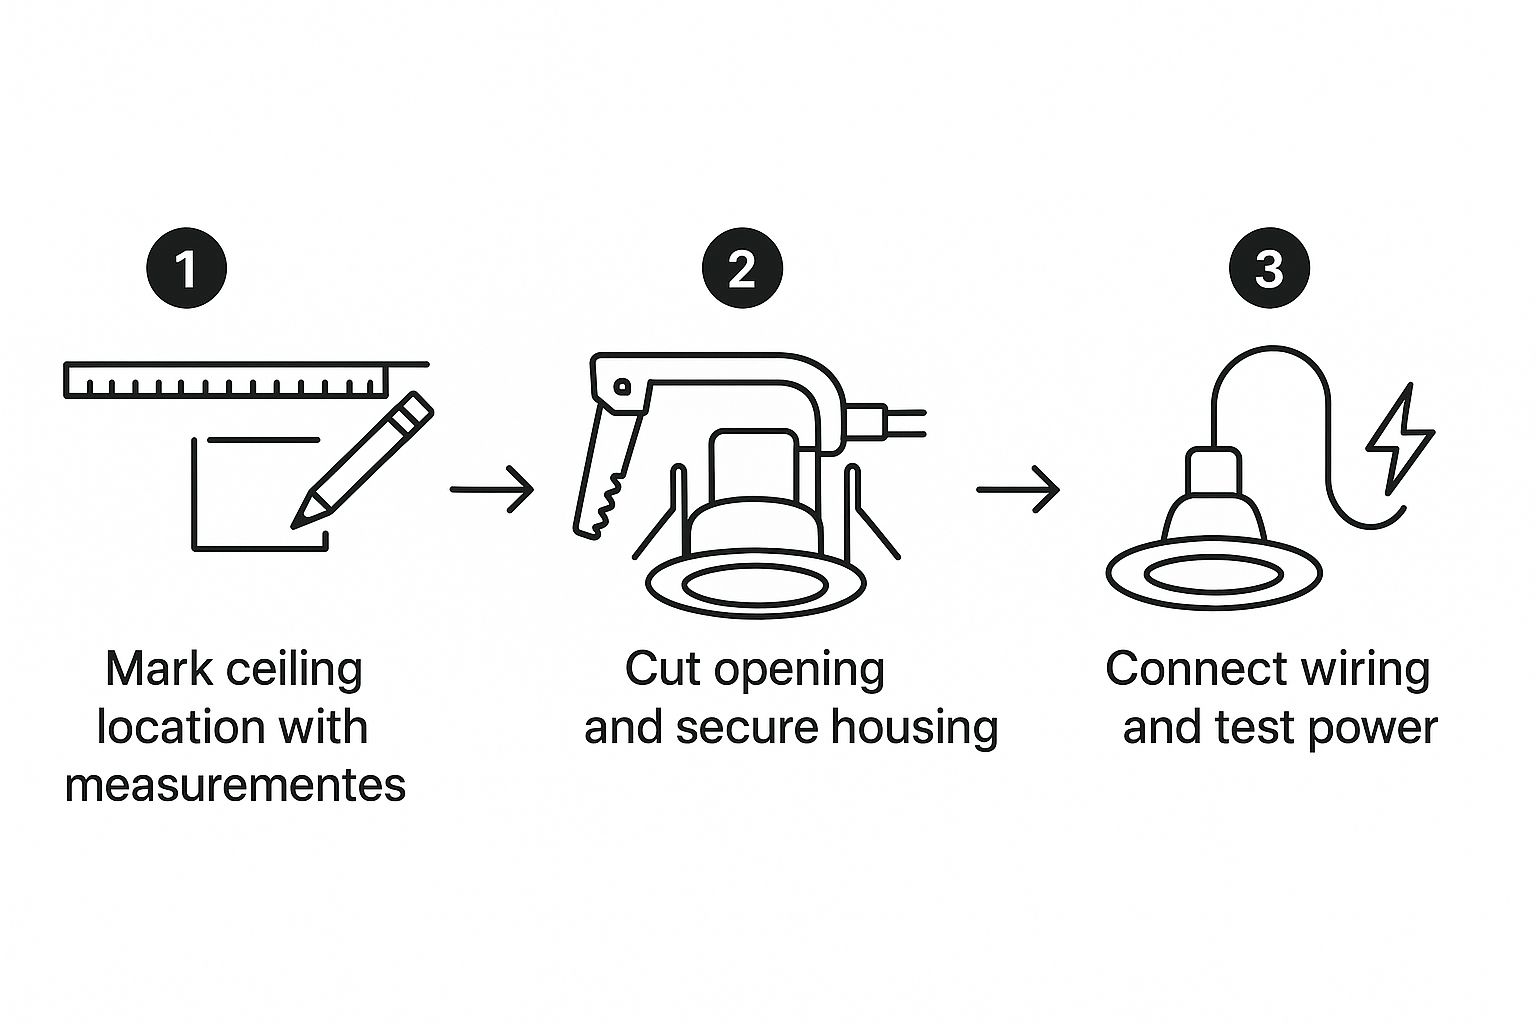
As you can see, the process moves from marking and cutting to mounting and wiring. It’s all about working step-by-step.
Running the Electrical Cable
First, you need to run an electrical cable from your power source, like a switch, to the first light fixture hole. Then, you'll run shorter cables from one light to the next. This is called "daisy-chaining."
You will use a non-metallic (NM) cable, also known as Romex. The wire size (gauge) is important. For most lighting circuits, you will need a 14-gauge wire on a 15-amp circuit. If it is a 20-amp circuit, you must use a thicker 12-gauge wire for safety.
- Feed the Cable: Run the main cable from the power source into the first light's hole.
- Connect the Chain: Run a separate cable from the first light's hole to the second, then to the third, and so on.
- Leave Extra Slack: At each hole, leave at least 6 to 8 inches of extra cable hanging down. This makes connecting the wires much easier.
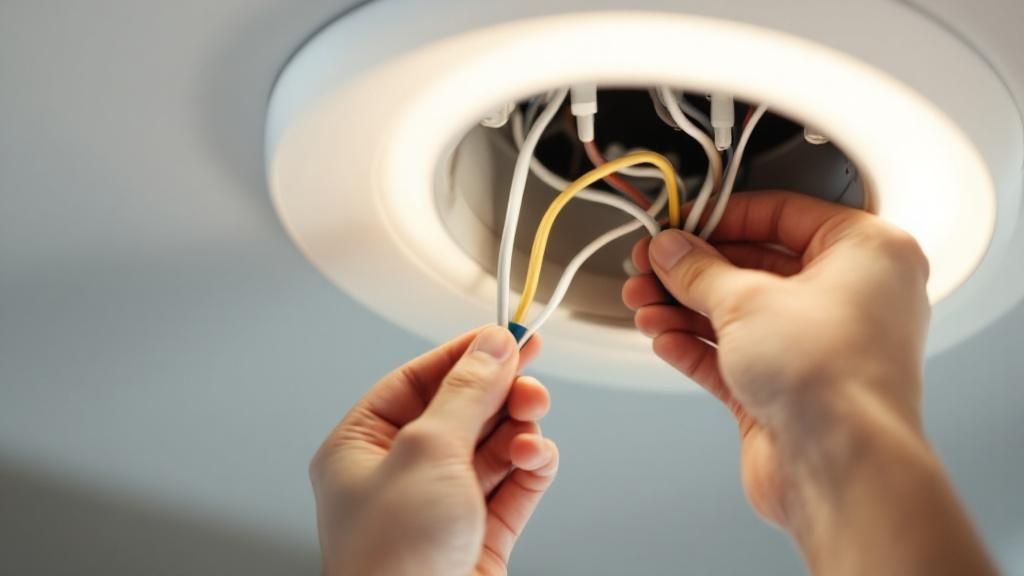
Making Secure Wire Connections
Now you can connect the wires inside each light's junction box. A loose connection can cause flickering lights or a fire hazard.
Open the junction box on the recessed light housing. You will see a black (hot), a white (neutral), and a bare copper or green (ground) wire. You will match these to the wires from the cables you ran.
Safety First: Before you touch any wires, check again with your non-contact voltage tester that the power is off. This is a crucial safety step.
You will use wire nuts or push-in connectors. Use your wire strippers to remove about 3/4 of an inch of the plastic insulation from the end of each black and white wire.
The Color-Coding Rule
Wiring uses a simple color code. You will always connect wires of the same color to each other.
Here is a quick guide to what each wire color means in most U.S. homes.
Standard U.S. Electrical Wire Color Codes
| Wire Color | Function | Connection |
|---|---|---|
| Black | Hot | Connects to other black (hot) wires. |
| White | Neutral | Connects to other white (neutral) wires. |
| Bare Copper/Green | Ground | Connects to other ground wires. |
This chart helps you make the right connections every time.
- Connect the Grounds: Twist all the bare copper ground wires together and secure them with a wire nut.
- Connect the Neutrals: Do the same with all the white (neutral) wires.
- Connect the Hots: Finally, connect all the black (hot) wires together.
After putting on each wire nut, gently pull on it to make sure it is secure. For more detailed help, see our guide on how to wire a light fixture.
Home lighting uses about 15% of all household electricity. This is a big reason why projects like this are popular. The recessed lighting market is growing, valued at around $8.1 billion in 2024, as people choose the energy savings of modern LEDs.
Securing the Fixtures and Adding Finishing Touches
Your wiring is done. Now it's time for the most satisfying part: putting the lights in place. This is where your hard work turns into a beautiful, finished lighting system.
You will set the housing, attach the trim, and then turn on the power. This is where your new recessed lighting starts to look like it belongs in your home.
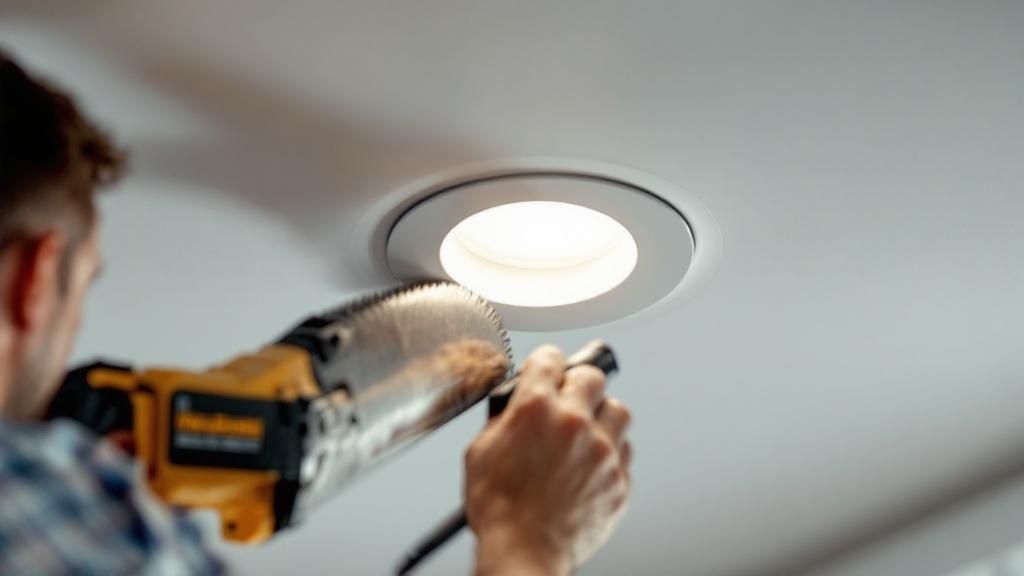
Installing the Recessed Light Housing
First, you need to get the main body of the light, or housing, into the ceiling. Gently push the wires up into the ceiling through the hole. Then, carefully push the housing up into the opening.
Once the housing is flat against the ceiling, lock it in. Most remodel housings have spring-loaded clips. Push these clips up. They will spring open and clamp onto the top of the drywall, holding the light tight.
You should feel a click as each clip engages. Gently pull on the housing to make sure it is secure. If it wobbles, a clip may not have caught correctly.
A Quick Tip for a Secure Fit: Make sure the clips have a firm grip. A wobbly fixture can make noise later on. A few extra seconds now can save you trouble.
Attaching the Trim and Installing the Bulb
The trim is the visible ring that gives the light a finished look. Many modern LED lights have the trim and light source built into one piece. This makes this step very easy.
Connect the trim to the housing using the small connector provided. Then, gently push the trim up into the housing. It is usually held by strong springs. Squeeze the springs together, slide them into the slots, and push the trim up until it is flat with the ceiling.
If your light uses a separate bulb, screw it in now. Make sure to use the right type and wattage for safety. Learn more about our showroom's selection of energy-efficient lighting solutions that are great for any project.
Finishing Touches for a Polished Look
You might have small gaps around the edge of the light. You can fix this easily with a small amount of lightweight spackle.
Let the spackle dry, sand it lightly, and then touch it up with ceiling paint. Wipe down the lights and ceiling to remove any dust.
Powering Up and Testing Your New Lights
It is time to see your work. Go back to your circuit breaker panel. Make sure your tools are put away and there are no exposed wires. Then, flip the breaker back to the “ON” position.
Now, go back to the room and flip the light switch. Your room should fill with beautiful, even light. Check that every light is working. If you installed a dimmer, test it to make sure it works smoothly.
When to Call a Professional in Salinas or Santa Cruz
Sometimes, things go wrong. If the lights do not turn on, or if the breaker trips, turn the power off again and check your wiring.
However, if you are not comfortable with electrical problems, the safest thing to do is call a licensed electrician. For homeowners in the Salinas or Santa Cruz areas, a local professional can fix the issue quickly and safely. Your safety is what matters most.
Common Questions About Recessed Lighting
Here are answers to some of the most common questions we hear from homeowners on the Monterey Peninsula about how to install recessed lighting.
How Far Apart Should My Recessed Lights Be?
A good rule is to divide your ceiling height by two. For a standard 8-foot ceiling, space your lights about 4 feet apart. This simple formula helps create balanced light in a room.
This is just a starting point. For a kitchen island in a Salinas home, you might want them closer together. In a living room, you might space them a bit wider. Always start the first row of lights about 2-3 feet away from the walls to avoid harsh shadows.
Can I Put Recessed Lights in an Insulated Ceiling?
Yes, but you must use the right product. You need to use fixtures that are IC-rated, which stands for "Insulation Contact." These are made to be safely covered with insulation without causing a fire.
Using a non-IC-rated fixture in an insulated ceiling is a serious safety risk. Always check the product box for the "IC" rating before you buy.
Do I Really Need a Permit to Install Recessed Lighting?
In many cases, yes. Here in Monterey County and nearby areas like Santa Cruz, running a new electrical circuit almost always requires a permit. This ensures the work is inspected and meets safety codes.
If you are just replacing old lights on an existing circuit, you may not need a permit. However, rules can differ by town. It is always smart to call your local building office before you start.
What's the Difference Between Remodel and New Construction Cans?
This is an important decision. The difference is how and when they are installed.
- New Construction Cans: These are installed before the drywall is put up. They attach directly to the ceiling joists for a very sturdy fit.
- Remodel Cans: These are for existing, finished ceilings. You slide the housing through a hole in the drywall, and clips hold it in place.
For any homeowner adding lights to a finished room, the remodel can is the one you need.
What Kind of Dimmer Switch Do I Need for LED Recessed Lights?
Not all dimmer switches work with modern LEDs. Using an old dimmer can cause problems.
You must use a dimmer switch made for LEDs. Look for labels like CL, LED+, or ELV (Electronic Low Voltage) on the package. An old dimmer can cause flickering, buzzing, or even damage your new LED lights.
Many people are also adding smart controls. If you are interested in connecting your lights to a smart home system, our guide on smart home lighting installation is a great resource.
Ready to transform your home with beautiful, functional lighting? The team at The Home Lighter Inc. is here to guide you through every step, from design to selection. Visit our Pacific Grove showroom or contact us today to start your lighting journey.