Installing outdoor lighting is a project that gives you instant rewards. It adds beauty, safety, and curb appeal to your home. But the secret to a great installation isn't about digging. It starts with a smart plan that sets your goals and highlights your home's best features.
Start with a Smart Lighting Plan
Before you buy a single light or unroll any wire, your most important tool is a solid plan. A good design ensures you buy the right gear and get the look you want. It helps you avoid those "I wish I'd thought of that" moments later on.
This kind of project is more popular than ever. The global outdoor lighting market grew from USD 17.46 billion to USD 19.11 billion in just a few years. With new tech, it’s expected to reach USD 43.07 billion. This shows how much we all value well-lit outdoor spaces.
As you plan, remember that a great atmosphere is more than just light. Think about all the details that will create a truly comfortable outdoor oasis for you and your guests.
Define Your Goals and Identify Key Features
The best way to start is with a walk around your property at dusk. This is the perfect time to see your yard with fresh eyes. You can figure out what you want your lighting to do.
Are you trying to:
- Boost Safety? Light up dark paths, stairs, or doorways to prevent trips and keep your home secure.
- Improve Curb Appeal? Highlight the beautiful details of your home or a special tree in your yard.
- Create Usable Space? Add light to patios or decks so you can enjoy them after the sun goes down.
Take notes or photos of the key features you want to light up. This could be a stone wall, a garden, or your front walkway. This first step is the foundation of your entire project.
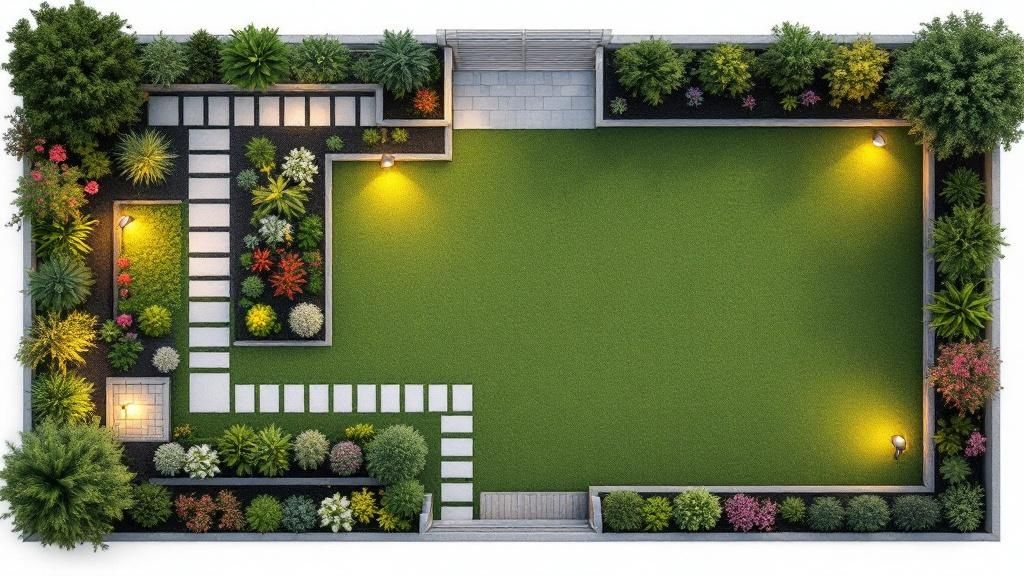
Sketch a Simple Lighting Map
You don't need to be an artist for this part. A basic sketch of your property is all you need. On your map, mark your power outlets and the features you want to highlight.
Next, add symbols for the different lights you imagine. Use an "X" for a spotlight on a tree or a circle for a path light. This visual guide helps you figure out how many lights you'll need and how much cable to buy.
A well-drawn plan prevents costly guesswork. It turns an idea into a clear roadmap, ensuring you purchase the correct number of lights and enough wire for the job.
Use Lighting Layers for a Professional Look
To get that professional, polished look, you need to think in layers. A great outdoor lighting design uses a mix of different light types. This creates depth, drama, and a welcoming feel.
Here's a simple way to think about layering your outdoor lights.
Outdoor Lighting Layers Explained
| Lighting Layer | Purpose | Common Fixture Types | Best Placement |
|---|---|---|---|
| Ambient Lighting | Provides soft, overall light for an area. | Downlights, String Lights, Post Lamps | Eaves of the house, pergolas, large trees |
| Task Lighting | Gives focused light for specific activities. | Step Lights, Deck Lights, Grill Lights | Stairways, pathways, outdoor kitchens, entryways |
| Accent Lighting | Creates visual interest by highlighting features. | Spotlights, Uplights, Well Lights | Trees, architectural details, garden beds, stone walls |
By combining these layers, you move beyond just lighting up the dark. You start creating a truly beautiful and dynamic outdoor space. This layering strategy is what will really make your property shine.
Choose the Right Tools and Fixtures
With your lighting map ready, it’s time for the fun part: picking your gear. This is where you choose the lights for your plan and gather the right tools. Making smart choices now ensures your lighting looks great and lasts for years, especially in our coastal Monterey Peninsula climate.
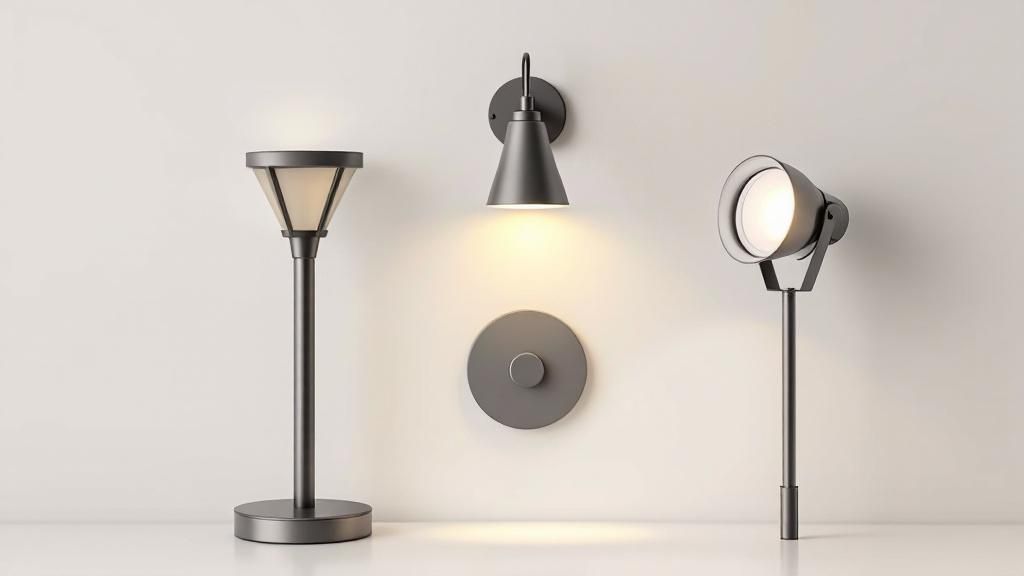
Think of your fixtures as the paintbrushes for your design. Path lights define walkways, while spotlights create dramatic uplighting on trees or home features. Knowing what each light does best is key to a professional-looking installation.
Selecting the Perfect Fixtures
Choosing the right fixture is about more than just its looks. It’s about matching the light to its purpose. Your sketched plan will guide you on where you need soft light versus a focused beam.
Here’s a quick rundown of common fixtures and where they work best:
- Path Lights: These cast light down and out, making them perfect for walkways and garden beds. They are essential for safety.
- Spotlights and Uplights: These are your go-to for creating a focal point. They cast a narrow beam of light to highlight trees, statues, or your home’s texture.
- Floodlights: With a wider beam, floodlights are great for lighting up large areas like driveways, mainly for security.
- Hardscape Lights: These small fixtures are designed to fit into retaining walls or deck steps. They provide subtle light without being visible.
Materials Matter on the Central Coast
For anyone living from Santa Cruz to Salinas, durability is key. The salty air from Monterey Bay can be harsh on outdoor materials. This is why investing in high-quality fixtures is so important here.
Fixtures made from materials like brass or copper are an excellent choice for our coastal environment. They develop a beautiful, natural look over time and won't rust. The initial cost might be higher, but they last much longer.
Your Essential Tool and Material Checklist
Having all your tools ready makes the installation process much smoother. You don't need a professional workshop, but a few key items are critical for a safe and lasting job.
Essential Equipment:
- Low-Voltage Transformer: This is the heart of your system. It plugs into a GFCI outlet and safely reduces your home's 120-volt power to a safe 12 volts.
- Low-Voltage Outdoor Cable: You'll need burial-grade cable, usually in 12-gauge or 14-gauge thickness. The thicker 12-gauge wire is better for longer runs.
- Wire Strippers: Use this tool to strip insulation from the cable without damaging the copper wire.
- Waterproof Wire Connectors: Silicone-filled wire nuts are a must. They create a secure connection and seal out moisture.
- Shovel or Trenching Tool: You'll need this to dig a shallow trench (about 6 inches deep) to bury your cable.
How to Calculate Your Transformer Size
One of the most common questions is about choosing the right transformer. It’s simple, and getting it right prevents headaches later. An overloaded transformer can fail, leaving you in the dark.
Here's the easy formula:
- First, add up the total wattage of all your lights. If you have ten 5-watt LED lights, your total is 50 watts.
- Next, multiply that total by 1.25 to add a safety buffer. In our example, 50 watts x 1.25 = 62.5 watts.
- Finally, choose a transformer with a capacity that meets or exceeds that number. A 75-watt or 100-watt transformer would be perfect.
Master Safe and Reliable Wiring
Wiring can seem like the hardest part of an outdoor lighting project, but it doesn't have to be. Low-voltage systems are designed to be safe for homeowners. Getting it right is about following a few key steps to make sure your system is reliable and lasts a long time.
You'll need to bury your cable, but not too deep. A trench about 6 inches deep is perfect. This protects the wire from lawnmowers and shovels.
Choosing Your Wiring Layout
How you run the wire from one light to the next affects your system's performance. Two common methods are the "daisy chain" and the "hub" layout. The right choice depends on your design.
-
The Daisy Chain Method: This is the simplest approach. You run a single cable from the transformer and connect each light in a series. It works well for shorter runs or a straight path.
-
The Hub Method: For more complex designs, the hub layout is better. A main cable runs from the transformer to a central point. From that "hub," smaller wires branch off to different groups of lights. This ensures every light gets consistent power.
The Importance of Secure Connections
From our experience, the most common point of failure is a bad wire connection. Here on the Monterey Peninsula, moisture can easily get into poorly sealed connections and cause problems. This is why using the right connectors is so important.
Our Go-To Tip: Always use silicone-filled wire nuts. These special connectors contain a waterproof gel that seals the connection from moisture and dirt. They are a small investment that makes a huge difference in reliability.
Making these connections is simple. Strip about a half-inch of insulation from the wires, twist them together, and screw on the waterproof wire nut. The gel inside will protect the connection for years.
The image below gives you a great visual of the whole process, from planning to making the final connections.
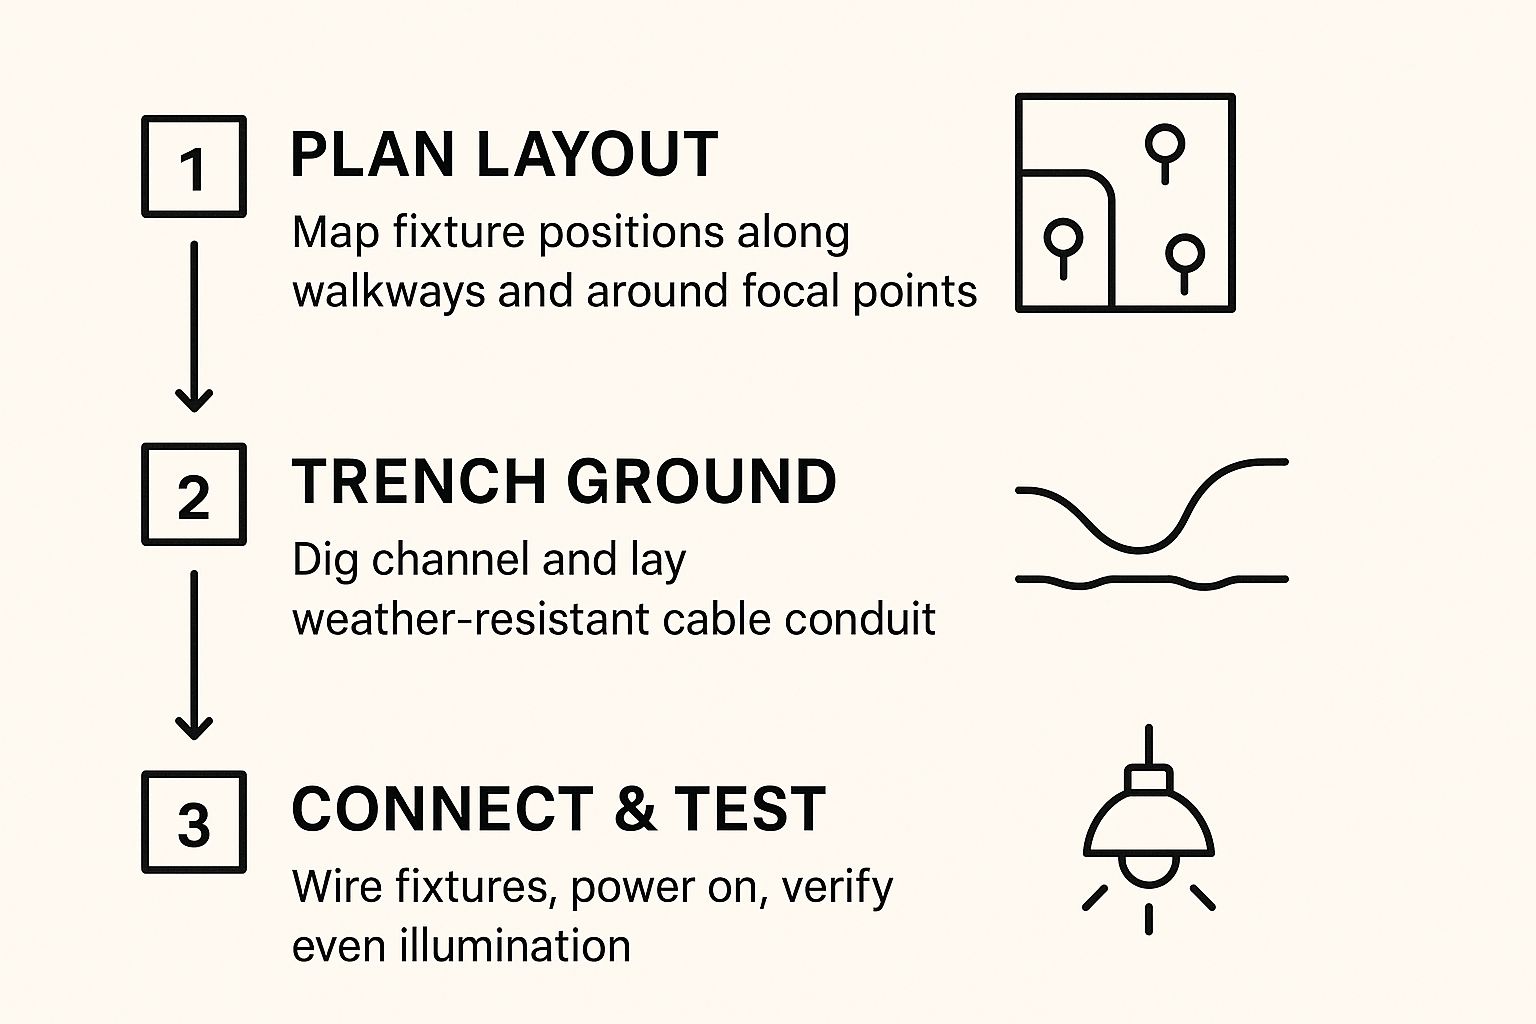
This kind of visual guide helps simplify the project. It shows how a logical workflow is the key to a successful installation.
Mounting and Connecting the Transformer
The transformer is the heart of your system. It should be mounted on a wall or post, at least a foot off the ground. This keeps it safe from rain and sprinklers. Most transformers plug into a GFCI-protected outlet, which is a key safety feature.
Connecting your main cable to the transformer is the final wiring step. Most transformers have terminals marked for 12V or 15V outputs.
- First, separate the two halves of your low-voltage cable.
- Next, strip about a half-inch of insulation from each side.
- Loosen the terminal screws on the transformer.
- Finally, secure one wire under each screw and tighten them firmly.
That's it. There’s no need to worry about positive or negative sides with these low-voltage systems.
If you feel unsure, our guide on how to wire a light fixture offers more tips. By taking your time and using the right materials, you’ll create a safe and reliable system.
Install And Position Lights Like A Designer
This is the moment your plan comes to life. Each light you place shapes how people see your outdoor space. Getting the details right will make your design look amazing.
Achieving Professional Lighting Effects
Creating those magazine-worthy scenes isn’t magic—it’s about technique. Two common approaches will give you a designer's touch.
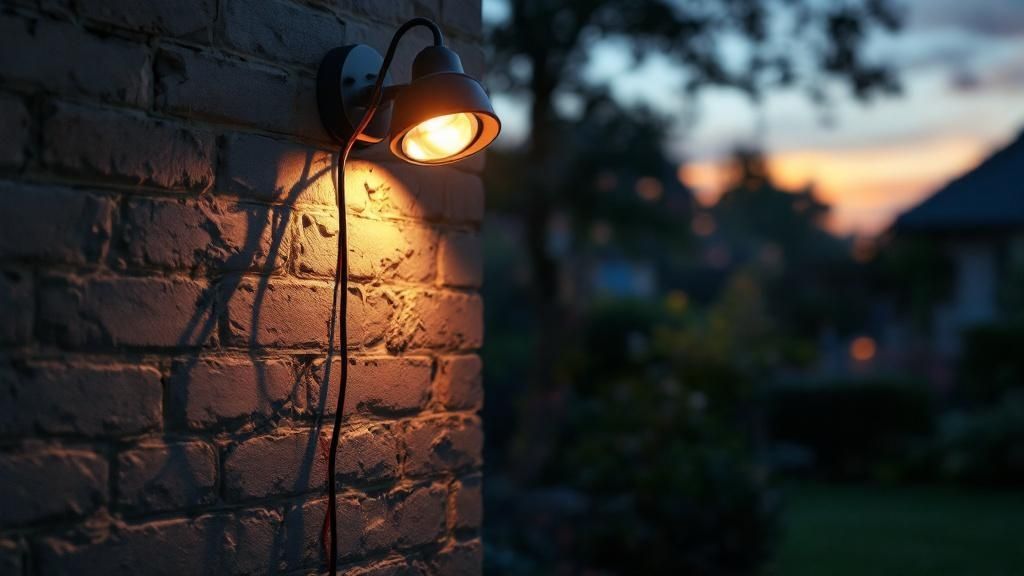
- Wall-Washing: Place a light close to your home’s surface and aim it slightly up. This covers the wall with a soft glow, highlighting its texture without harsh spots.
- Silhouetting: Put a spotlight behind an interesting object, like a shrub. Aim it toward a wall to turn the object into a bold, dark shape.
“Great lighting is the balance of revealing and concealing. You guide the eye to focal points while letting other areas drift into gentle shadow.”
Smart outdoor lighting not only looks beautiful but also boosts curb appeal. This can be very helpful if you need tips for selling your home.
Practical Tips For Perfect Placement
A few simple tips will help you avoid common mistakes.
- Watch For Light Spill: Aim lights so they don’t shine into windows or your neighbor’s yard.
- Use Glare Guards: These small shields attach to lights to keep the beam focused where you want it.
- Level And Stake Path Lights: Make sure each path light stands straight and is set firmly in the ground.
Below is a quick guide to common lighting techniques.
Fixture Placement and Lighting Effect
| Lighting Technique | Goal | Recommended Fixture | Placement Tip |
|---|---|---|---|
| Uplighting | Create drama and highlight texture. | Spotlight or Well Light | Place at the base of a tree or wall, aiming upward. |
| Path Lighting | Provide safe navigation and define edges. | Path Light or Bollard | Stagger lights on alternating sides of the path, about 8-10 feet apart. |
| Downlighting | Mimic natural moonlight for a soft glow. | Bullet Light or Downlight | Mount high up in a tree or under an eave, aiming down. |
| Grazing | Emphasize the texture of a surface. | In-Ground or Bullet Light | Place the light very close to the wall and aim it almost parallel to the surface. |
Once your lights are in place but before you bury the cables, wait for dusk. Walk around your yard and adjust the angles of the beams. When you’re happy with how it looks, you can finish the job. For more ideas, explore our landscape lighting design ideas.
Test and Fine-Tune for a Perfect Finish
Don't bury those wires just yet. This final step is what separates a good DIY job from a professional one. It’s your chance to fix any issues and adjust the details. A few small tweaks here make all the difference.
Check for Voltage Drop
One common issue in low-voltage lighting is voltage drop. This is when lights at the end of a long wire look dimmer than the ones closer to the transformer. It happens because electricity loses a little power as it travels.
You'll need a simple multimeter to check for it.
- Set your multimeter to AC voltage (marked with a V~ symbol).
- With the lights on, touch the probes to the wire connection on the very last light in a line.
- You want to see a reading above 10.5 volts. If it's lower, the light will be dim and its lifespan could be shorter.
If you find a big drop, don't worry. The fix is usually easy. You might need to use a thicker wire (like 12-gauge instead of 14-gauge). Or, you can switch to a "hub" layout to shorten the wire runs.
Think of a voltage check as a health report for your lighting system. It’s the only way to be sure every light is getting the power it needs.
The Critical Nighttime Review
You can't really judge your lighting design during the day. The magic happens after the sun goes down. Once it's dark, turn on the system and walk around your property.
Look for a few common issues:
- Dark Spots: Are there any dark areas along a path or between key features?
- Hot Spots: Are any lights creating a harsh glare or an overly bright spot?
- Beam Angles: Is that spotlight hitting the tree perfectly, or is it shining on your house?
Now is the time to make final adjustments. A path light might need to move a few inches. A spotlight may need to be tilted up a bit. These small corrections will make your project look truly beautiful.
For more pro tips, check out our guide on outdoor lighting secrets.
Frequently Asked Questions About Installing Outdoor Lighting
Here are answers to some of the most common questions we get from homeowners.
What Is The Difference Between Low Voltage and Line Voltage Lights?
Low-voltage lighting systems run on a safe 12 volts. They use a transformer to lower your home's standard 120-volt power. This makes them much safer for a DIY installation and is the top choice for landscape lighting. Line-voltage lighting runs at the full 120 volts. It's used for powerful security lights and should only be installed by a licensed electrician due to the higher shock risk.
How Do I Pick The Right Size Transformer?
Choosing the right transformer is simple. First, add up the total wattage of all your lights. For example, if you have ten lights that each use a 5-watt LED bulb, your total is 50 watts. The key is to choose a transformer where your total wattage uses no more than 80% of its maximum capacity. This prevents the transformer from being overworked and gives you room to add more lights later. For a 50-watt system, a 75-watt or 100-watt transformer would be a perfect choice.
What Is Voltage Drop And How Do I Avoid It?
Voltage drop is when lights at the end of a long wire look dim. This happens because electricity loses power as it travels. You can avoid it by using a thicker wire (like 12-gauge), keeping wire runs as short as possible, or using a "hub" wiring layout. A hub layout runs a main wire to a central point, with shorter wires branching off to different groups of lights.
How Often Does My Lighting System Need Maintenance?
Modern LED systems need very little care. A quick check-up twice a year is usually all it takes. In the spring and fall, wipe down the glass lenses on your lights to keep them bright. Trim back any plants that might be blocking the light, and make sure all the fixtures are still standing straight. A few minutes of simple care will keep your system looking great.
Can I Mix Different Brands Of Lights On The Same Transformer?
Yes, you can mix and match different brands of low-voltage lights on the same system. This gives you the freedom to choose the perfect light for each spot. Just make sure every light is designed to run on a 12V AC system. Also, check that the total wattage of all your lights doesn't exceed your transformer's capacity.
To see how different lights can work together, check out our guide to outdoor lighting.
Ready to bring your outdoor lighting vision to life? The experts at The Home Lighter, Inc. are here to help you select the perfect fixtures and design a plan that makes your home shine. Visit our showroom in Pacific Grove or schedule a consultation with our lighting designers today.