
Direct Answer: An integrated LED downlight has no bulb, so the trim module itself is the replacement part. Match it by aperture size and color temperature, since the original model number is often discontinued.
One light in the kitchen goes dark. The other five in the run are fine, so you get the ladder, twist the trim, and find there is nothing to unscrew. No socket, no bulb, just a sealed disc with a wire coming out of it.
That is an integrated LED downlight, and the fixture module is the replacement part. This trips up a lot of homeowners in Pacific Grove and Carmel whose recessed lighting went in during a remodel ten or twelve years ago and has simply run quietly ever since.
Here is the position this article takes: in most cases, stop trying to find the exact model you bought. Those lines get retired, and a decade-old downlight has drifted in color anyway. Match by aperture and specification, and if the dead light sits in a visible run, plan on replacing the whole run instead of chasing one unit.
Why Replacing a Failed LED Recessed Downlight Is Not a Bulb Swap
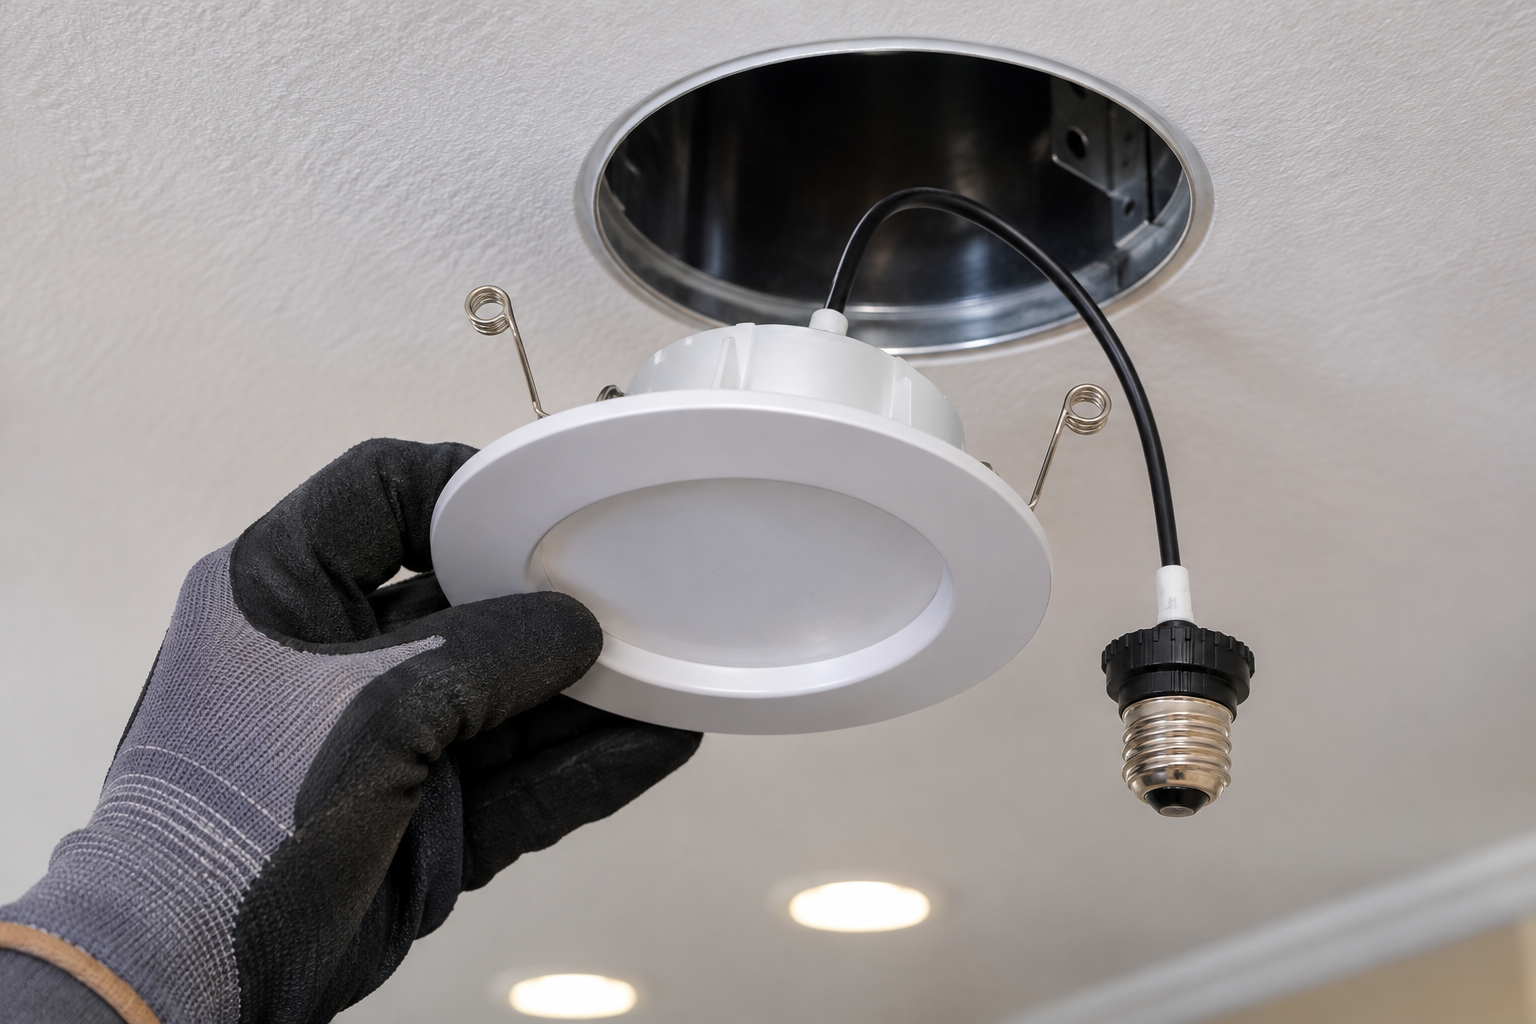
An integrated LED fixture has the diodes, the heat sink, and the driver built into one sealed unit. There is no lamp to pull because the light source is soldered to a board inside the housing.
When one of these dies, the diodes are usually still fine. The failure is almost always somewhere else:
- The driver, the small power supply that converts household voltage for the LED board, which runs hot and wears out first
- A solder joint on the board that cracked after years of heating and cooling cycles
- A loose connector at the pigtail or the socket adapter
- Dimmer mismatch that has been quietly stressing the driver for years
None of those are field-repairable on a sealed module, which is why the trim and the light come out together as one part.
This matters on the Peninsula because so much of the recessed lighting here went in during the 2010 to 2015 remodel wave, when integrated LED cans were new and heavily promoted. Those fixtures are now right in the window where drivers start to quit. Salt air in homes close to the shoreline in Pacific Grove and Pebble Beach does not help electronics either.
If you are deciding what to buy next, it is worth understanding the tradeoff between integrated LED and replaceable bulb fixtures before the next round of lights goes in.
Replace One, or Replace the Whole Run?
This is the real decision, and it comes down to color, not hardware.
A downlight that has been on for thousands of hours has shifted. The output has dropped slightly and the color has warmed or cooled a little depending on the chip. Drop a brand new 3000K module into the middle of that row and it will often read cooler and brighter than its neighbors, even when both spec sheets say the same number.
So judge it the way you will actually see it. Stand in the room at night with every light on, in the spot where you normally stand, and look at the ceiling and the surfaces underneath.
- A single light in a hallway, closet, or perimeter run usually disappears. Replace just that one.
- A light in a visible run over a counter, island, or dining table will stand out every single day. Replace the run.
Give yourself permission to do the full row. It costs more up front and it ends the problem permanently, instead of leaving you with a ceiling you keep looking at.
It also helps to ask for the right things when you shop. Instead of asking for the same one I had before, ask for a specific Kelvin number, a CRI of 90 or higher, and a beam spread that suits the ceiling height. Plenty of Carmel kitchens with white oak and pale stone look noticeably better at 2700K than at the 3000K that got installed by default, and warm dimming LED technology is worth a look if you dim those lights at night.
One Light or the Whole Row: How to Decide
Where the dead downlight sits usually decides the question for you.
| Where the dead light is | Will a mismatch show? | Common recommendation |
|---|---|---|
| Row over a kitchen island or counter | Yes, daily | Replace the full run at once |
| Over a dining table or in a sightline from the main living space | Usually | Replace the run, or relocate the odd unit |
| Hallway, stairwell landing, or closet | Rarely | Replace the single unit |
| Perimeter wall wash in a bedroom | Sometimes | Look at it at night before deciding |
| Garage, laundry, or utility space | No | Replace the single unit |
What to Measure and Photograph Before You Shop
This is where online replacement attempts go sideways. The most common mistake is ordering four of the wrong thing because the listing looked close enough.
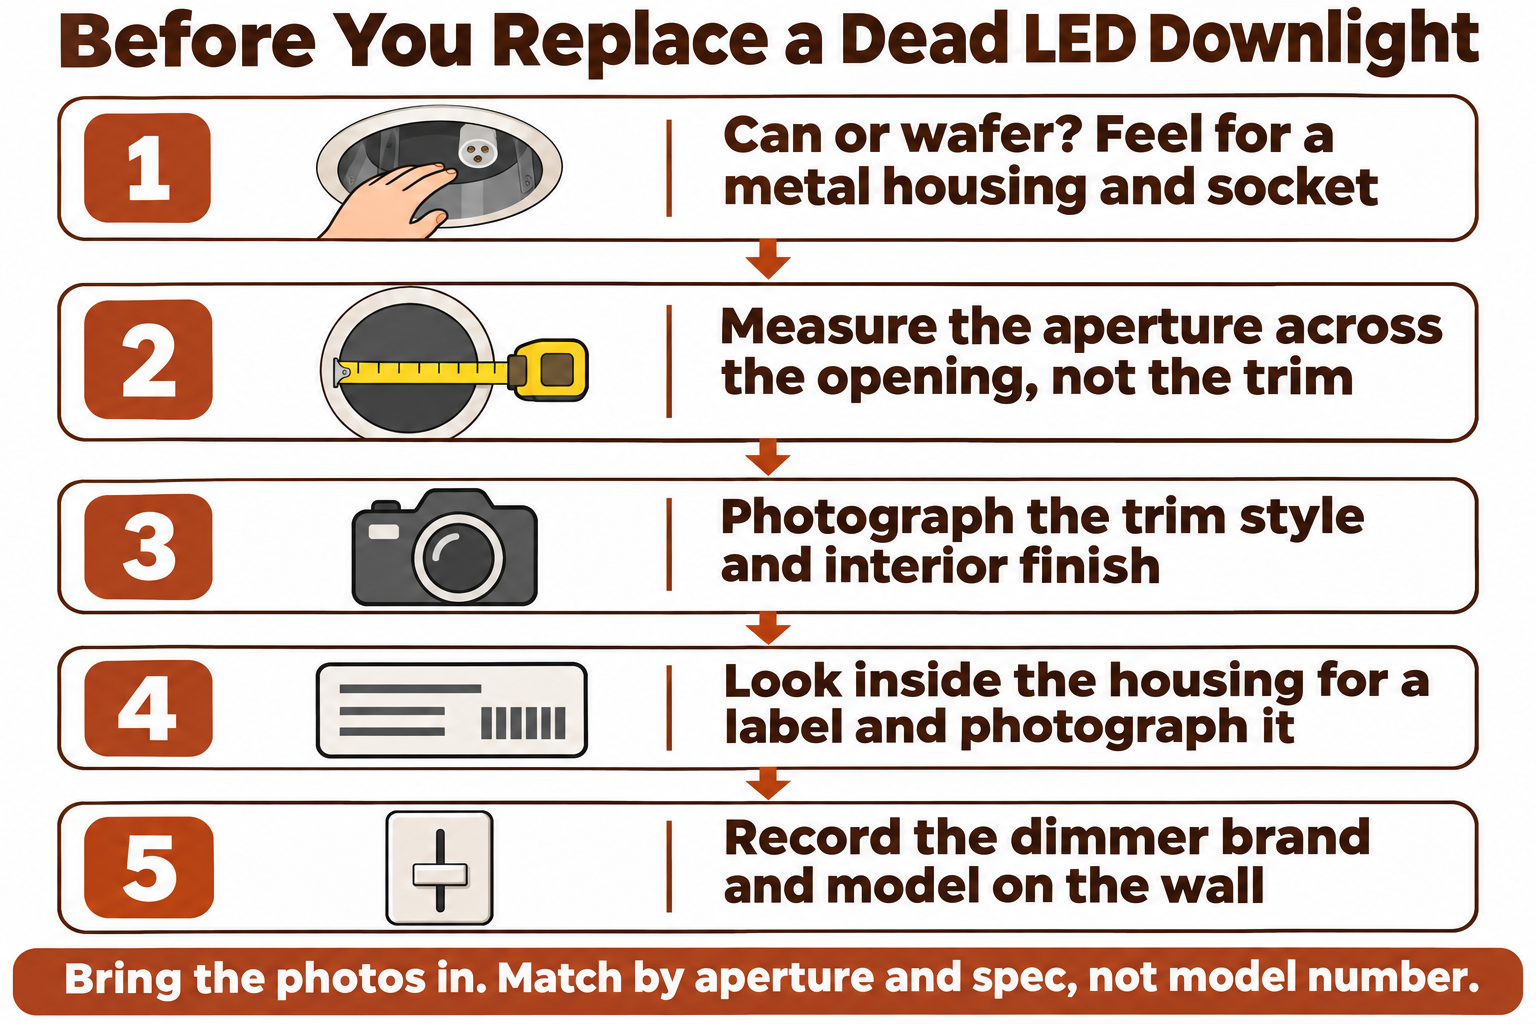
First, figure out what you own. There are two very different setups behind that trim:
- A retrofit module in an existing metal can. The old housing stays in the ceiling and the module screws into the existing socket with an E26 adapter. This is a trim swap.
- A canless wafer. There is no housing at all. The light is held by spring clips and wired straight to a small junction box above the drywall. This is a wiring job.
If you reach a finger past the trim and feel a metal can and a socket, you have the first kind. If you feel only drywall and a flat wafer, you have the second.
Then gather five things, which takes about five minutes with a phone flashlight and a tape measure:
- The aperture, measured across the ceiling opening itself, not the outer trim ring
- The trim style and interior finish, such as a white baffle, black baffle, or a specular reflector
- Any label stuck inside the housing, photographed close enough to read
- The ceiling type, including whether there is insulation above and whether it is drywall or tongue and groove
- The dimmer in the wall, brand and model, taken off the back of the paddle if you can safely pull the plate
Do not be surprised when the model number leads nowhere. Manufacturers retire popular retrofit lines on a regular cycle. A widely installed 5 inch and 6 inch retrofit family, for example, now shows as discontinued on the manufacturer’s own product page with a successor line pointed out instead. The replacement gets matched by aperture and specification, not by part number.
The Five-Minute Downlight Checklist
Work through this before you shop, then bring the photos with you rather than guessing from a product listing.
Who Does the Work, and the California Wrinkle
A retrofit module going back into an existing can is often a straightforward swap. Kill the breaker, unscrew the old unit from the socket, screw in the new one, tuck the wire, and set the springs.
Anything beyond that belongs with a licensed electrician:
- Canless or hardwired units, which involve a junction box connection
- Any new housing going into the ceiling
- Dimmer replacement or rewiring, including adding a neutral
- Adding or relocating cans, which changes the circuit layout
There is also a California piece worth knowing. The 2025 Building Energy Efficiency Standards took effect January 1, 2026, and they govern lighting controls and efficiency on remodels and new construction statewide. A one-for-one replacement of a dead fixture is a different situation from adding cans or moving them, so confirm current requirements with your licensed contractor or your local building department before a project grows. In Monterey County that could mean the county, the City of Monterey, or Pacific Grove, and Carmel-by-the-Sea layers its own exterior lighting rules on top for anything outside the house.
One more thing to check while the electrician is there. If your lights were buzzing, flickering, or dropping out at low dim levels before the failure, the dimmer may have been part of the problem. Dimmer and LED compatibility is a frequent complaint, and one homeowner who wrote in described a flickering dimmable LED that was driving them crazy and said they were open to a new system if it fixed it.
The Quiet Advantage of Buying Where Someone Keeps Records
Here is something almost nobody writing about recessed lighting can offer. A fixture bought from a local showroom often has a record behind it.
That record is what turns an orphaned downlight into a solved problem. Someone can look up what the original was, what replaced it in the line, and which current module fits the same aperture at a compatible color temperature.
This is not theoretical. Peninsula homeowners come back years later with exactly these questions. One customer wrote in asking the showroom to “send me the receipt for the Hubbardton Forge light we purchased from you in 2019.” A Carmel Valley homeowner came back about a dimmer and transformer for chandeliers bought years earlier, with her electrician standing in the room.
That is also what shows up in the reviews. One customer put it this way: “Their in-depth knowledge of so many brands and the technical aspects of each light fixture allow you to purchase lighting with the confidence that it will be stunning and exactly what you need in every space.”
Greg at The Home Lighter can usually point you toward the current equivalent once he sees the photos, and in plenty of cases an older fixture needs one part rather than a whole new light.
Frequently Asked Questions About Replacing a Failed LED Recessed Downlight
Can I just put a new bulb in my LED recessed light?
Not if it is an integrated LED. There is no socket and no lamp, so the whole trim module is the replacement part. If you reach past the trim and find a standard screw-in socket, then you have a can with a bulb or a retrofit module, and that is a different situation.
One downlight failed after ten years. Are the rest about to go?
Not necessarily, but they are in the same age range and have logged the same hours. Drivers do not all fail at once, though they tend to fail within a few years of each other. That is one more reason to replace a visible run together rather than one at a time.
What does a replacement downlight module cost?
It varies a lot by aperture, color quality, and brand. Basic retrofit modules sit at the low end of the market, while units with CRI 90 or higher, smooth dimming, and better trims cost meaningfully more. Labor is separate and depends on your electrician’s rate. Call the showroom with your aperture size and spec for a real number on a specific fixture.
My exact model is discontinued. Now what?
That is normal. Manufacturers retire retrofit lines regularly and usually publish a successor. The replacement gets matched by aperture, lumen output, Kelvin, CRI, and beam spread rather than by model number, which is why those photos and measurements matter more than the old part number.
Will a new module work with my existing dimmer?
Sometimes, and sometimes not. Older dimmers were built for incandescent loads and can cause flicker or buzz on a low-wattage LED. Bring the dimmer brand and model when you shop so the fixture and the control get matched on purpose.
Sorting Out One Dead Downlight in a Monterey County Ceiling
If you have a dark spot in an otherwise working row, the fastest path is to measure the aperture, photograph the trim and the dimmer, and bring those with you. The showroom at 2034 Sunset Drive in Pacific Grove keeps a curated collection across a wide range of apertures and color temperatures, and The Home Lighter can be reached at (831) 655-5500 for questions about a specific module. Walk-ins are welcome, and appointments are available for more involved projects.
