
Direct Answer: A well-lit kitchen requires three layers — ambient, task, and accent. Skipping any one of them, especially task lighting under the cabinets, leaves the space looking flat and frustrating to cook in.
One of the most common patterns at the showroom on Sunset Drive is a homeowner who walks in with one fixture in mind — a pendant for the island, or a track head for a prep area — and no plan for the rest of the kitchen. It’s an easy trap to fall into. You find something you love, and the rest feels like it should sort itself out.
But kitchen lighting almost never works that way. It’s a system, not a single decision. And the kitchens that end up feeling wrong — too dark at the counter, too bright at the table, flat and shadowless at night — almost always got that way because someone solved one layer and skipped the others.
This guide breaks down the three layers every kitchen needs, the specific decisions within each one, and the mistakes that are genuinely worth avoiding. For homeowners in Carmel-by-the-Sea, Pacific Grove, and Carmel Valley — where kitchens often pull double duty as prep space and entertaining space — getting this right makes a real difference every single day.
The Three Layers of Kitchen Lighting (And Why All Three Matter)
Every kitchen lighting plan works across three functional layers. Each one does something different, and each one requires a different fixture type.
- Ambient lighting provides overall illumination for the room — the baseline that lets you see the space. Recessed downlights, flush mounts, or semi-flush mounts typically handle this layer.
- Task lighting delivers focused light exactly where you’re working. Under-cabinet strips or puck lights are the primary tool here, aimed directly at countertops where prep happens.
- Accent lighting adds visual depth and interest — highlighting open shelving, tile, or architectural features that give the kitchen its character. Pendants over an island often do double duty as both task and accent.
The most common and most consequential mistake is skipping the task layer entirely. No matter how bright the overhead light is, it comes from above and behind you. The moment you stand at the counter to chop or prep, your own body casts a shadow on the surface. You’re working in your own shadow — and the fix has nothing to do with the ceiling fixture.
For more on how different fixture types serve different rooms, understanding what makes each fixture type the right choice is a useful place to start.
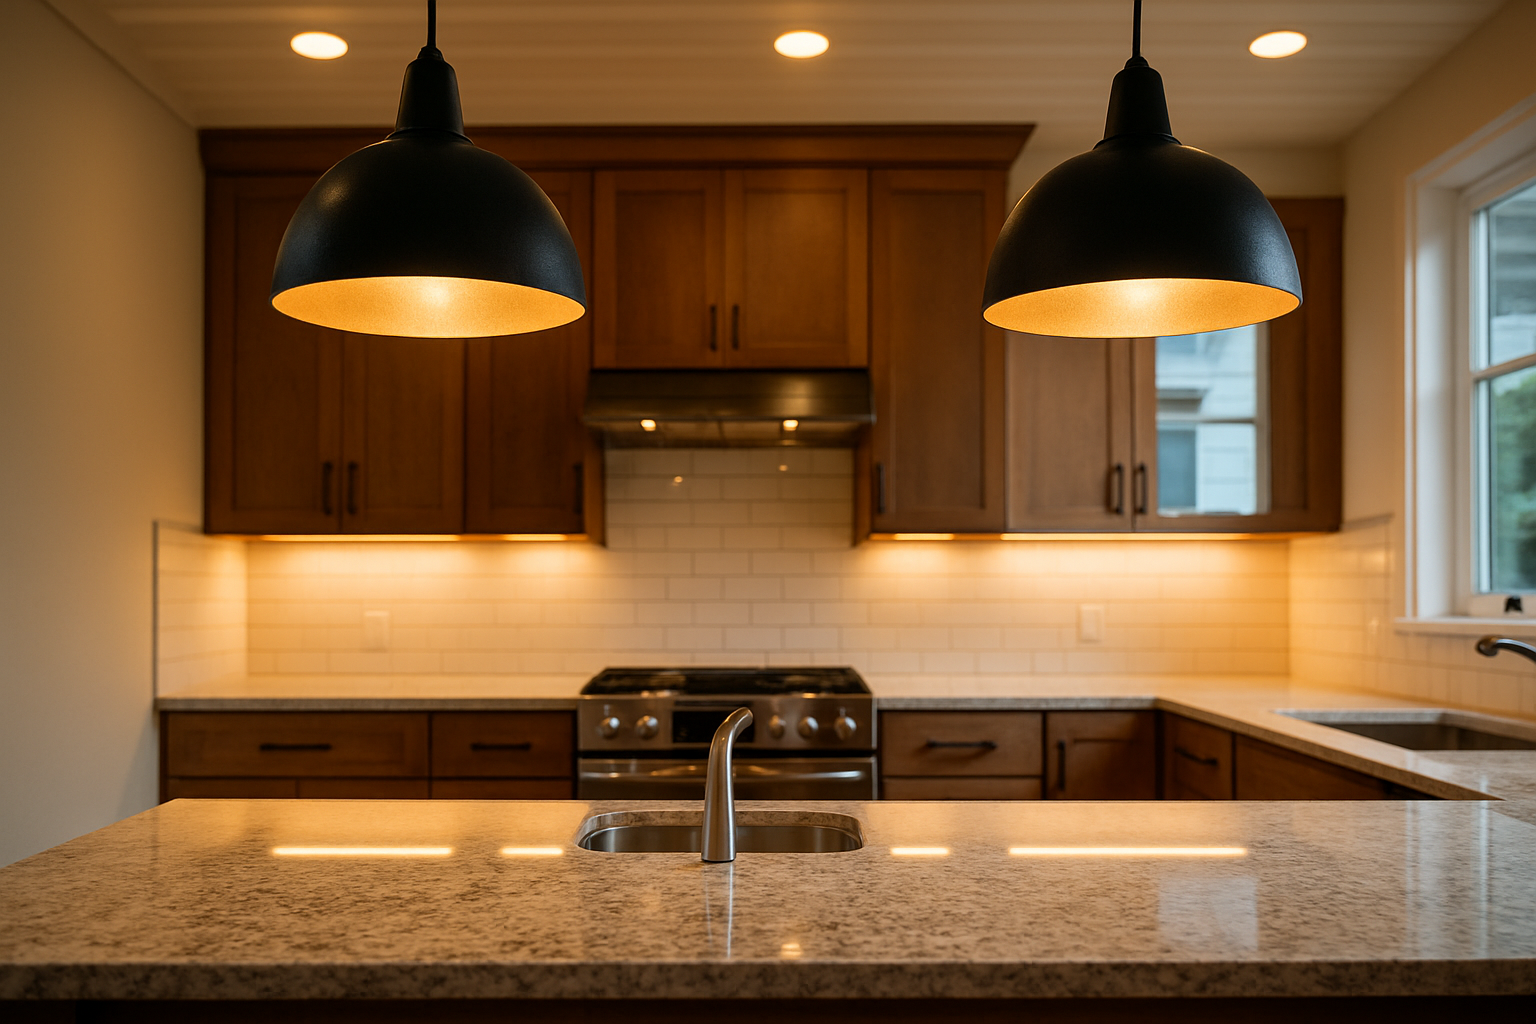
Under-Cabinet Lighting: Strips vs. Pucks and Where to Mount Them
Under-cabinet lighting comes up constantly in homeowner conversations — and almost always as a surprise. People install it expecting a minor improvement and find it changes how they use their kitchen every day. That’s not an exaggeration; it’s what customers consistently describe after the fact.
The strip-versus-puck question is worth answering directly:
- Continuous LED strips produce even, shadow-free light across the full counter depth. There are no gaps, no bright spots, no dim zones between fixtures.
- Puck lights create overlapping pools — brighter at the center, softer at the edges between each puck. For shorter runs, this is workable. For a counter longer than 18 inches, the uneven spread becomes noticeable.
For most kitchens, strips produce better results on longer runs. But placement matters just as much as fixture choice. Mount the strip too close to the front cabinet edge and it creates glare when you’re seated at a nearby table or island. Mount it too far toward the wall and the front half of the counter stays dim.
The target zone for most installations is roughly one-third of the cabinet depth back from the front face — far enough to eliminate glare, close enough to light the full counter surface. A licensed electrician installing your fixtures can confirm the right position for your specific cabinet depth, but it’s worth knowing before you finalize your fixture selection.
Pendant Sizing Over a Kitchen Island: The Proportions That Actually Work
Pendant placement over an island is one of the most specific questions kitchen lighting raises — and one of the more common reasons homeowners end up with a result that looks off without knowing why.
The rules of proportion are straightforward once you know them:
- Hang height: Pendants should hang 30 to 36 inches above the countertop surface for standard kitchen islands. Higher than that and the light spreads too wide and loses focus. Lower and the fixture gets in the way.
- Number of pendants by island length:
- Under 4 feet: one pendant, centered
- 4 to 6 feet: two pendants, spaced roughly one-third of the island length in from each end
- Over 6 feet: three pendants, or a linear multi-light fixture spanning the island
- Pendant diameter: Scale to the island length. A small pendant on a long island looks like an afterthought. An oversized pendant crowds the cabinetry and competes with everything else in the room.
The most common error isn’t wrong fixture style — it’s wrong scale. Two pendants that are too small for a six-foot island look fine in a product photo and look wrong the moment they’re installed. Seeing scale in person, in a showroom with full-size fixtures on display, is genuinely useful before committing to a purchase.
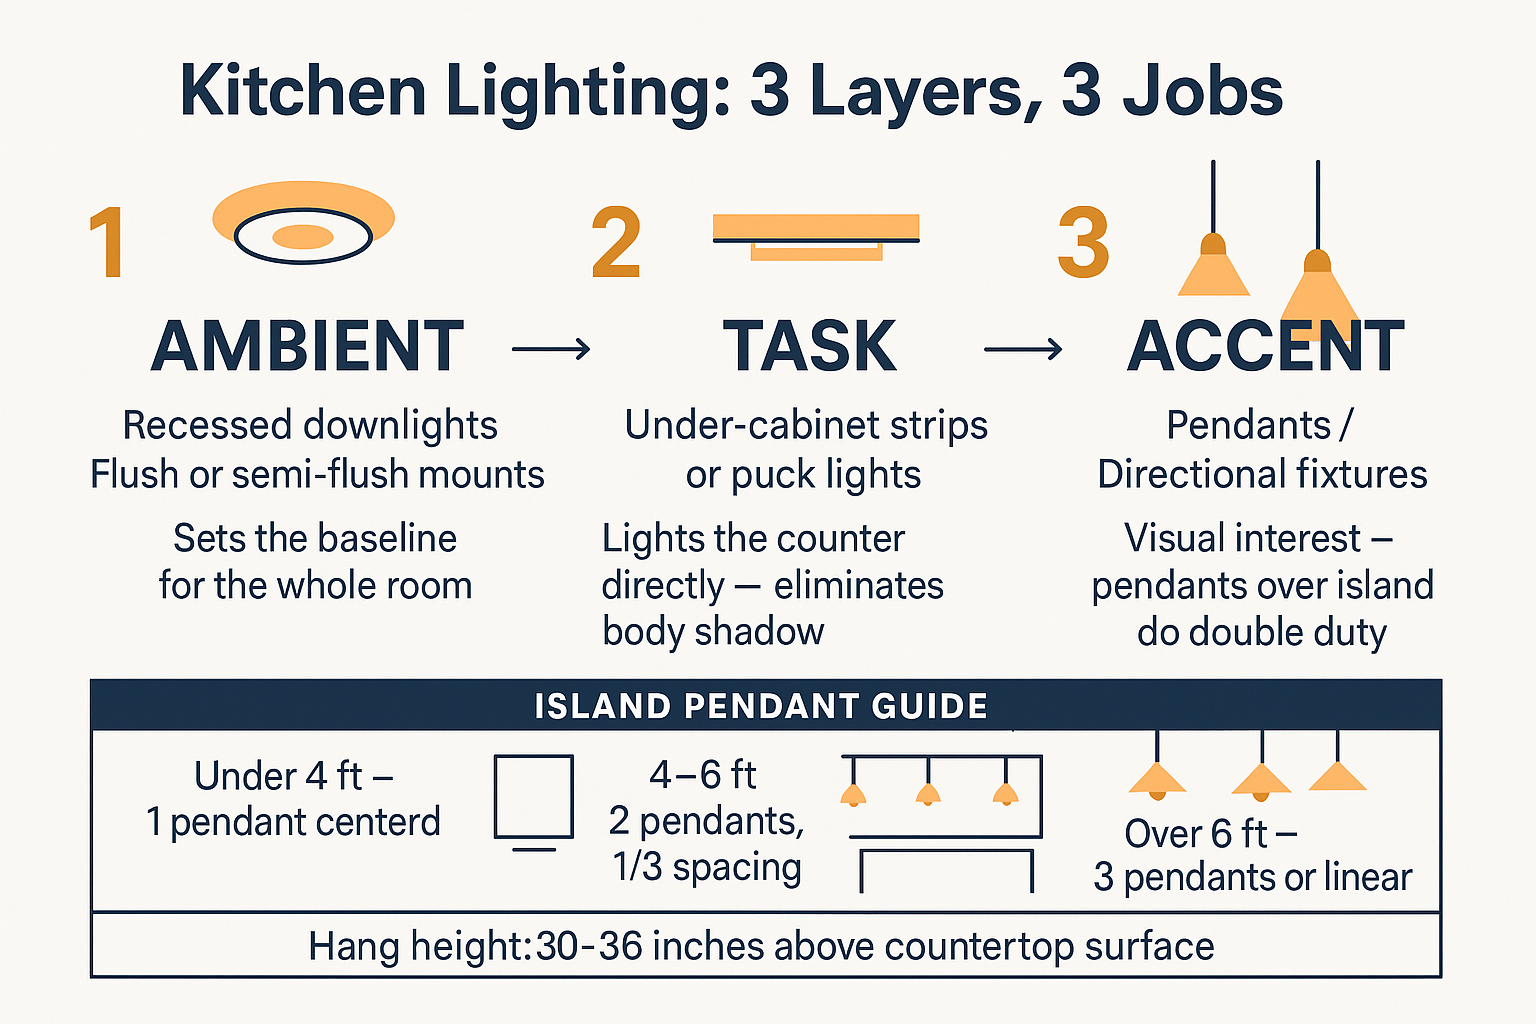
Kitchen Lighting Layout at a Glance
This reference breaks down all three lighting layers, the fixtures that serve each one, and the key sizing rules for a standard kitchen island.
Color Temperature in the Kitchen: Warmer Isn’t Always Better
Color temperature is one of those decisions that feels minor until you’re standing in a kitchen that got it wrong. Here’s how the range breaks down in a cooking environment:
- 2700K (warm white): Flattering, residential feel. Works beautifully for ambient and accent layers. But it can make it harder to accurately read food color — which matters more than it sounds when you’re checking whether meat is cooked or produce is fresh.
- 3000K–3500K (neutral white): Better visibility for prep and cleaning. The right choice for task lighting under cabinets. Can feel clinical or flat if used for every fixture in the space.
The most practical approach is to run the ambient and accent layers at 2700K to 3000K and let the under-cabinet task lighting run slightly cooler. Or — better still — put everything on dimmers so the kitchen shifts modes depending on what you’re doing.
Many homes in Carmel Valley and Pacific Grove serve as primary entertaining spaces. A kitchen that can move from full-brightness prep mode at 5pm to a lower, warmer atmosphere by 7pm is doing a different job than a kitchen that’s fixed at one output. Dimmer compatibility isn’t automatic; it depends on the fixture and the LED driver, so it’s worth confirming before finalizing any purchase. Home lighting controls — dimmers, scenes, and how they work together covers that topic in more detail.
For a deeper look at how dim and warm interact — and why they’re not the same thing — the difference between dim and warm is worth reading before you finalize your control setup.
Kitchen Lighting Layer Quick Reference
Use this as a starting checklist when planning fixture selection for any kitchen remodel or upgrade.
| Layer | Primary Fixture Type | Key Decision Point |
|---|---|---|
| Ambient | Recessed downlights, flush/semi-flush mount | Coverage pattern and color temperature (2700K–3000K) |
| Task | Under-cabinet LED strips or puck lights | Strip for runs over 18″, placement 1/3 depth from cabinet face |
| Accent / Island | Pendants, linear multi-light fixture | Hang height 30–36″, quantity scaled to island length |
| Controls | Dimmers for all layers | Confirm LED and driver compatibility before purchasing |
California Title 24 and What It Means for Kitchen Lighting
Any kitchen remodel or new construction in California will run into Title 24, the state’s building energy efficiency standards. As of January 1, 2026, updated requirements govern lighting controls and efficiency ratings for residential projects — and kitchen lighting is one of the areas with specific requirements.
The practical implication for most homeowners is that kitchens in permitted remodels will need to meet efficiency standards for fixtures and may require specific control types, including dimmers or occupancy sensors in some configurations. The California Energy Commission’s Title 24 residential compliance resources are the authoritative source for current requirements.
This doesn’t mean the fixtures you want are off the table — most high-quality LED fixtures meet the efficiency requirements without compromise. But it does mean fixture selection should happen with compliance in mind, not as an afterthought. A licensed electrician or contractor pulling permits for your project will confirm what applies to your specific scope of work. The fixture sourcing conversation is a separate step — and one where knowing the compliance context before you shop saves time.
Frequently Asked Questions About Kitchen Lighting Fixtures
How many recessed lights does a kitchen actually need?
There’s no single formula, but a common starting point is one recessed light for every 20 to 25 square feet of ceiling area, spaced evenly across the room. The bigger variable is beam angle — a narrow beam puts light in a tight spot; a wider flood angle covers more area per fixture. Ceiling height matters too. A higher ceiling needs more fixtures or higher-output fixtures to achieve the same surface illumination. The goal is even coverage without dark corners or bright spots.
Can I use the same pendant style over the island that I have in the dining room?
Sometimes, but not always. A pendant that works beautifully over a dining table may be scaled for that context — and may not throw enough focused light for a kitchen island work surface. Pendants over an island need to do some functional work, not just look good. That said, there’s no rule against using a consistent design language across rooms. The key is confirming that the pendant you love also produces enough downward light for a prep surface, not just ambient glow.
Are LED strips bright enough for real kitchen task lighting?
Yes — modern LED strips are more than adequate for under-cabinet task lighting in most residential kitchens. The critical specs to look for are lumens per foot (higher is brighter) and color rendering index (CRI) — a CRI of 90 or above means colors look accurate and true, which matters for food prep. Strips vary significantly in quality, so the fixture source matters as much as the spec.
What’s the difference between a flush mount and a semi-flush mount for ambient kitchen lighting?
A flush mount sits directly against the ceiling with no gap — ideal for lower ceilings where clearance is limited. A semi-flush mount drops a few inches below the ceiling on a short stem, which gives the fixture more visual presence and often allows for a larger shade or diffuser. For kitchens with 8-foot ceilings, flush mounts are usually the safer choice. For 9-foot and above, semi-flush mounts read better proportionally. Every type of light fixture explained covers the full range if you’re working through multiple rooms.
Do kitchen pendants need to be on a dimmer?
It’s strongly worth considering. A kitchen that serves as a prep space during the day and an entertaining space in the evening benefits enormously from the ability to dial down the island pendants at night. The one constraint is that not every pendant or LED bulb is dimmer-compatible — you need to confirm the fixture, the bulb or driver, and the dimmer switch are all rated to work together. Mismatched components are the most common reason dimmers flicker or buzz.
Ready to Plan Your Kitchen Lighting the Right Way?
Greg and Tammy at The Home Lighter have been helping Monterey Peninsula homeowners work through exactly these decisions since 1969 — from under-cabinet strip selection to full kitchen lighting plans for remodels in Carmel Valley, Pacific Grove, and Pebble Beach. Walk-ins are always welcome at the showroom at 2034 Sunset Drive in Pacific Grove, and appointments are available for more involved projects. You can also reach the showroom directly at (831) 655-5500.